
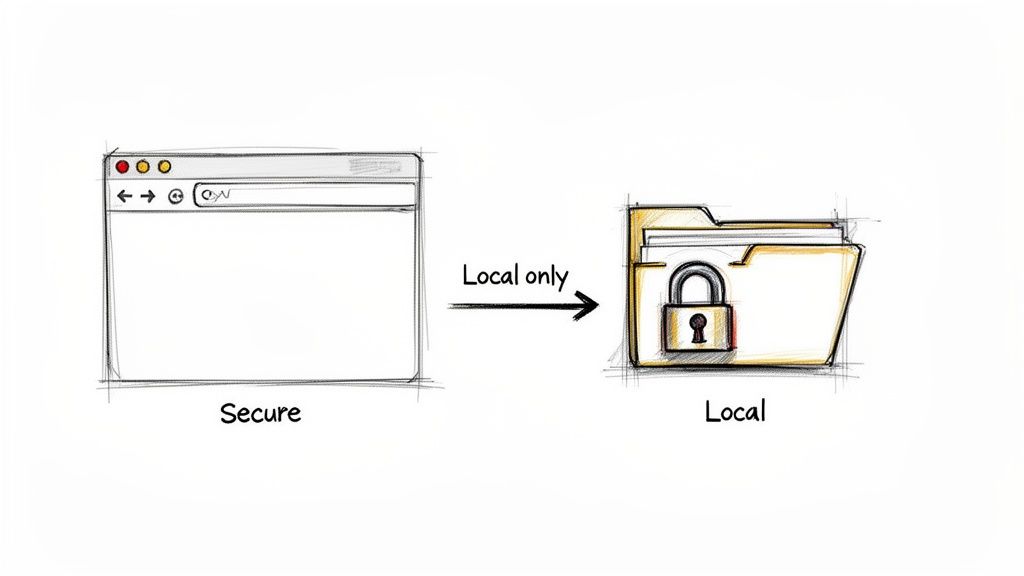
That little icon in your browser tab—the favicon—is a small but mighty piece of your website's identity. But think about it: how do you usually make one? You probably find a free online tool, upload your logo, and download the .ico file. It's quick, but it opens a door to security and privacy risks that most developers would rather keep shut.
This is where an offline favicon ico generator comes in. By processing your images right inside your browser, it ensures your valuable brand assets never, ever leave your computer.
Why an Offline Favicon ICO Generator Is a Smarter Choice
In an age where every click and upload is tracked, even the simplest development tasks deserve scrutiny. When you use a standard online favicon converter, you're sending a core piece of your brand's intellectual property—your logo—to someone else's server. That single action creates an unnecessary risk.
Security-conscious teams know to avoid this process because it can lead to several problems:
- Data Exposure: Who knows how long your logo file is stored on that server? It could be scanned, logged, or even exposed in a data breach.
- Third-Party Tracking: Many "free" online tools are riddled with trackers that monitor your activity for advertising or data collection purposes.
- Network Latency: Your conversion speed is at the mercy of your internet connection and the server's load, which can be frustratingly slow.
- Unpredictable Results: You have zero control over the server's compression algorithms, and you're out of luck if the service goes down.
The Client-Side Advantage
An offline, browser-based tool like the one from Digital ToolPad completely changes the game. It runs entirely on the client side, meaning all the processing happens locally on your machine. Your files are never sent over the network. This gives you absolute control and, of course, instant results.
This approach is non-negotiable for teams working on pre-launch brands, confidential projects, or in regulated industries where keeping data local is a strict compliance requirement. It's a fundamental part of modern website security best practices.
The core principle here is simple: if a tool doesn't need your data to function, it should never ask for it. This zero-trust model cuts off a whole category of security vulnerabilities before they can even become a threat.
To put the scale of this into perspective, traffic data from Semrush.com shows a popular online generator can get over 93,000 visits in a single month, with users spending almost seven minutes on the site. That’s a massive number of brand assets being uploaded to third-party servers every day. For anyone who values privacy, this trend alone is a compelling reason to switch to an offline alternative.
To make the distinction clearer, here’s a quick rundown of how the two approaches stack up.
Online vs Offline Favicon Generators at a Glance
| Feature | Typical Online Generators | Digital ToolPad (Offline Generator) |
|---|---|---|
| Data Privacy | Logo uploaded to a third-party server | 100% local processing; files never leave your device |
| Security Risk | Potential for data exposure, logging, or breaches | None; operates entirely offline in your browser |
| Processing Speed | Dependent on network connection and server load | Instant; uses your computer's processing power |
| Reliability | Susceptible to server downtime or service changes | Always available, works even without an internet connection |
| Third-Party Tracking | Often includes ads and user activity trackers | No trackers, no ads, no data collection |
Ultimately, choosing an offline tool means you get a faster, more secure, and more dependable workflow.
This commitment to privacy isn't just about favicons; it's a philosophy. It’s the same reason you’d use an offline QR code generator for creating codes with sensitive URLs or private contact details. By opting for client-side tools, you're choosing a better way to work.
Getting Your Source Image Ready for a Perfect Favicon
Your final favicon is only as good as the image you start with. Honestly, if you nail this first part, the rest of the process is a breeze. A lot of people jump straight to a favicon ico generator, but spending a few minutes prepping your source file is what separates a professional result from a blurry, amateurish one.
The best practice here is to start big. I always recommend using a high-resolution, perfectly square image—aim for at least 512x512 pixels. This gives the generator plenty of detail to work with when it scales your image down to those tiny 16x16 and 32x32 pixel sizes. If you start small and try to scale up, you're just asking for a pixelated mess.
Thinking Small: Key Design Tips
You have to remember, this image is going to live in a browser tab. It's tiny. All those intricate details, whisper-thin lines, and fancy text in your main logo? They'll just turn into an unrecognizable smudge.
- Isolate and Simplify: If your logo has a wordmark and an icon, just use the icon. Think about it—instead of trying to cram the full "Digital ToolPad" name and logo into a 16x16 square, you'd just use the distinct "DP" mark. It’s all about instant recognition.
- Go for High Contrast: Your favicon needs to stand out against light, dark, and gray browser themes. Mid-tones and subtle gradients get lost in the noise. Stick to bold, contrasting colors that guarantee your icon is always visible, no matter the browser's UI.
- Use a Transparent Background: This one is non-negotiable. Always save your source image as a PNG with transparency. This is how you avoid that ugly white or black box framing your icon, letting it sit cleanly in the browser tab.
I see this mistake all the time: people try to squash their entire rectangular logo into a square canvas. It completely distorts the design and makes it look terrible. The right way to do it is to pull out the most identifiable part of your brand and let that be the star of your favicon.
Once your design is simplified and ready to go, double-check that it’s perfectly square. If you need to adjust it, don't just stretch it to fit—that ruins the proportions. Instead, use a simple tool like an online image resizer to properly crop it to a 1:1 aspect ratio. This quick final step ensures your favicon looks sharp and intentional, representing your brand exactly how you want it to.
Generating Your Favicon with a Secure Browser Tool
Now that you have your source image polished and ready to go, it’s time to convert it into a proper .ico file. For this, I’m a big fan of using secure, client-side tools like Digital ToolPad's favicon generator. The whole process runs right inside your browser, which means your logo never leaves your machine. It’s simple, fast, and completely private.
Sure, there are a ton of favicon tools out there, and many, like Canva's editor, are packed with features. But for anyone who's serious about security—especially developers and businesses—uploading company assets to a random web server is a non-starter. With data sovereignty being a top priority for 70% of firms, the risk of a leak is just too high. This is where Digital ToolPad shines; its 100% client-side processing means no uploads, no tracking, and no data being sent anywhere.
This diagram breaks down the prep work. Getting your source image right from the start makes the rest of the process a breeze.
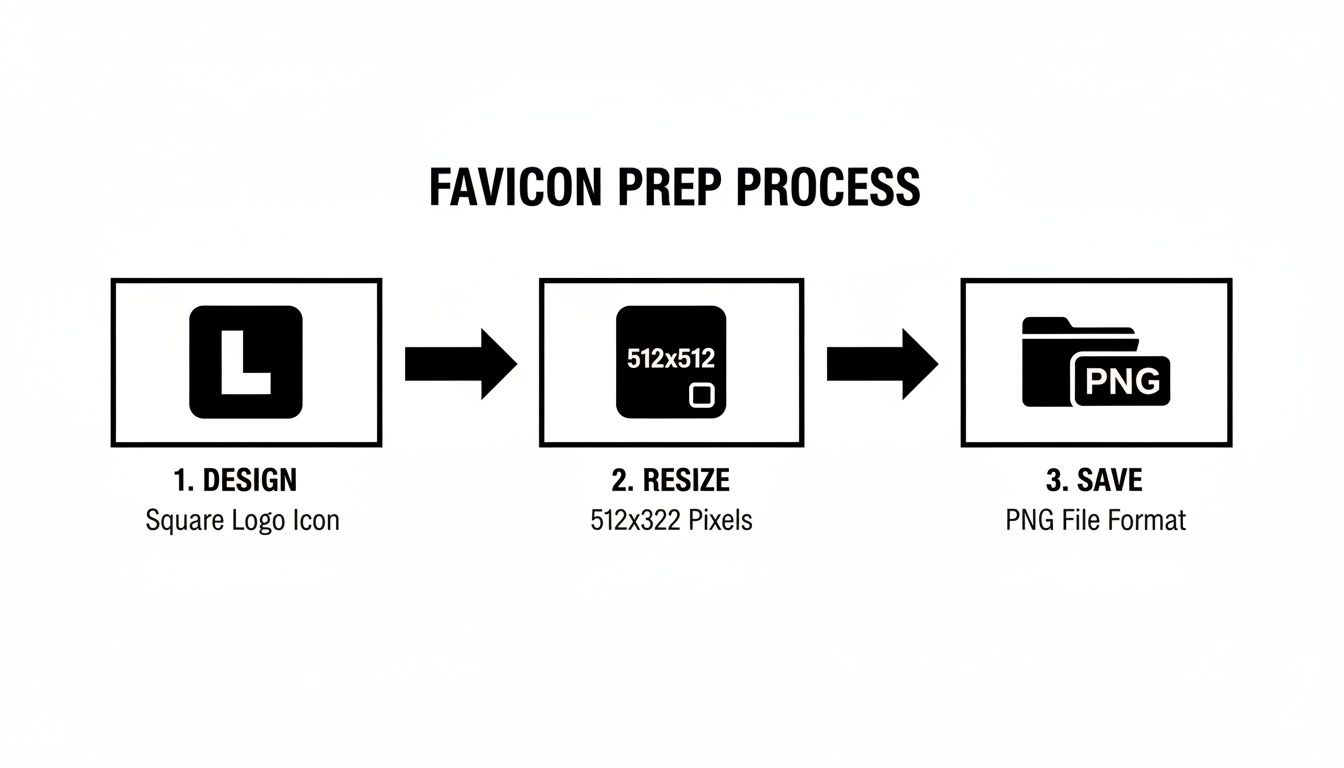
As you can see, the path from initial design to a final PNG file is pretty straightforward, but it's a critical foundation for a great favicon.
Picking the Right Sizes
Once you drop your image into the tool, you'll see a checklist of different resolutions. Your favicon.ico file is actually a container that can hold multiple sizes, allowing browsers and operating systems to pick the best one for the job. You don't need to go crazy, but a few key sizes will cover almost every use case.
Here are the non-negotiables I always include:
- 16x16 pixels: The classic. This is what you see in browser tabs and old-school bookmark lists.
- 32x32 pixels: A must-have for taskbar shortcuts and retina displays where 16x16 looks fuzzy.
- 48x48 pixels: Windows often grabs this size for desktop icons or in File Explorer.
And if you're starting from a blank canvas and need some inspiration, a modern AI icon generator can be a fantastic creative partner. It can help you brainstorm concepts that you can then refine into a simple, recognizable icon. Whether you design it yourself or get a head start from AI, the goal is to begin with a crisp, high-quality image.
Making the ICO File
After you’ve ticked the boxes for the sizes you want, the tool gets to work instantly. There's no waiting around for an upload to finish or for a server to process your file. The conversion from your PNG to a multi-resolution ICO happens in a blink.
That instant download is your proof of privacy. When a tool can process and deliver a file without any network lag, you know your data stayed on your machine. That’s the real advantage of a client-side generator.
The interface is built for speed. You just upload your image, select your sizes, and hit download. It's a two-click process that takes you from a source PNG to a finished favicon.ico in seconds.
Once you click "Download Favicon," the .ico file saves directly to your computer. It’s now ready to be dropped into your website's root directory. This kind of secure, efficient workflow is exactly what you need when you're trying to get things done quickly without cutting corners on security.
Creating Favicons from the Command Line with ImageMagick
If you’re a developer who practically lives in the terminal, using a browser-based favicon ico generator can feel like an unnecessary step. For those who prefer scripting, automation, and pure command-line power, there’s a much better way: ImageMagick. It’s a beast of an open-source software suite that lets you create and manipulate images right from the command line, making it a perfect tool to slot into any automated build process.
Instead of dragging and dropping files into a web interface, you'll use a single, precise command. This approach gives you total control and, more importantly, makes the process repeatable—a huge win for any serious development workflow.
The Go-To Command
Once you’ve got ImageMagick installed and running, making a favicon is surprisingly simple. The real magic is in one command that takes your source image and packs multiple resolutions into a single .ico file.
This is the command I keep handy for just this task:
convert source.png -define icon:auto-resize=256,128,64,48,32,16 favicon.ico
So what's happening here? The convert command is the workhorse of ImageMagick. It takes your source.png as input and uses the -define icon:auto-resize flag to automatically generate smaller versions. The numbers that follow—256,128,64,48,32,16—tell it exactly which pixel dimensions to include in the final favicon.ico.
Using the command line isn't just about avoiding a GUI. It's about turning asset generation into a predictable, version-controlled part of your project. You can drop this command into a build script, and you’ll never have to manually update a favicon again.
CLI vs. Browser Tool: Which Is Better?
So, should you stick with a browser tool or fire up the terminal? Honestly, it just depends on your workflow.
A browser-based tool like Digital ToolPad is incredibly fast, easy to use, and requires zero installation. It's the perfect choice for a quick, one-off task or for anyone who isn't comfortable tinkering with command-line tools.
ImageMagick, on the other hand, is built for automation. It shines when you need to bake favicon generation into a bigger process, like a CI/CD pipeline or a static site generator's build script. The only trade-off is the initial setup and getting familiar with the commands.
There's clearly a huge demand for simple tools, with 'favicon generator' pulling in around 14,800 monthly searches. But for developers and DevOps pros who are serious about security, uploading a company logo to some random website is a non-starter. This is where both Digital ToolPad and ImageMagick have a massive advantage: all the processing happens on your machine.
Keeping everything local is a critical feature that engineering teams report can speed up workflows by 30-50% by removing cloud dependencies. You can dive deeper into how different tools stack up by checking out more tool insights on Pixazo.ai.
At the end of the day, both methods get the job done. Whether you prefer the click-and-go ease of a browser tool or the raw power of the command line, keeping your assets offline is always the smartest, most secure move.
Putting Your New Favicon to Work: Implementation and Testing
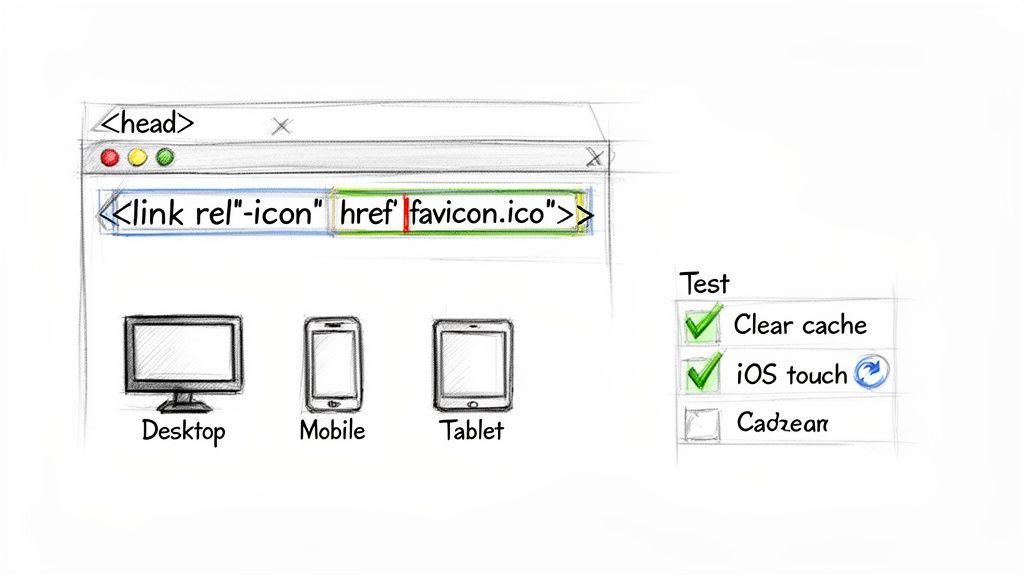
Alright, you've created a fantastic favicon.ico file. Now for the fun part: getting it live on your website and making sure it shows up everywhere you expect it to. It's not quite as simple as just uploading the file; you need to give browsers a little roadmap by adding some key HTML to your site’s <head> section. This ensures every browser and device knows exactly which icon to grab.
The old-school method was dead simple: drop favicon.ico into your website's root directory and add one little link tag. For a long time, that was good enough.
But today's web is a different beast. To make sure your icon looks crisp and professional on everything from a high-resolution desktop monitor to an iPhone home screen, a more robust strategy is needed. The modern approach involves offering a few different formats, letting each browser intelligently pick the best one for the job.
The Essential HTML for Modern Favicons
To cover all your bases without overcomplicating things, your site’s <head> tag should point to three distinct icon types. This setup gives you maximum compatibility across the vast majority of devices and browsers out there.
Here are the three declarations I use on almost every project:
- The Classic ICO: This is your trusty fallback. It catches older browsers and some random web crawlers that still only look for the
favicon.icofile.<link rel="icon" href="/favicon.ico" sizes="any"> - The Scalable SVG: For modern browsers, nothing beats an SVG. It's infinitely scalable, meaning it looks perfectly sharp on any screen, at any resolution. Many developers, myself included, now treat this as the primary favicon.
<link rel="icon" href="/icon.svg" type="image/svg+xml"> - The Apple Touch Icon: This one's crucial for iOS. It’s a 180x180 pixel PNG that iPhones and iPads use when someone saves your site to their home screen. It makes your site look like a native app.
<link rel="apple-touch-icon" href="/apple-touch-icon.png">
With these three lines in place, you’ve built a future-proof system that serves the right icon to the right context, keeping your brand looking consistent. If you're really into optimizing every last byte, you might find it interesting to learn about techniques like Base64 encoding, which can embed tiny images directly into your code.
Verification and Troubleshooting: Don't Skip This Part!
Just because the code is in doesn't mean the job is done. Now you have to verify it actually works. Caching issues and browser quirks are the bane of every developer's existence when it comes to favicons, so don't just check one browser and call it a day.
I can't tell you how many times I've heard, "My favicon shows up in Chrome but not Firefox!" This is almost always a caching problem. Before you start pulling your hair out, the very first thing to try is a hard refresh (Ctrl+F5 or Cmd+Shift+R) and clearing your browser's cache.
Run through this checklist to be absolutely sure your icon is working correctly:
- Browser-Hop: Open your site in Chrome, Firefox, Safari, and Edge. See what happens.
- Go Mobile: Pull up the site on an iPhone and an Android phone. How does it look in those mobile browsers?
- Check Your Paths: Pop open your browser's developer tools (usually F12) and click the "Network" tab. Reload the page and filter for your icon files. If you see a 404 error, the
hrefpath in your HTML is wrong or you forgot to upload the file. - Bookmark and "Add to Home Screen": Seriously, do it. Bookmark your site on a desktop browser. Then, on your phone, use the "Add to Home Screen" feature to make sure the
apple-touch-iconis being used as expected.
Following these steps will ensure the icon you carefully created with a favicon ico generator becomes a reliable and professional signature for your website.
Common Favicon Questions Answered
Even with the best tools, a few questions always seem to pop up when you're working with favicons. I’ve seen these come up time and again in developer forums and client meetings, so I've gathered the most common ones here to give you some clear, practical answers. This should help you navigate the finer points of creating and implementing the perfect site icon.
Let's clear up some of the usual points of confusion.
What Is a Multi-Resolution ICO File and Why Is It Important?
Think of a multi-resolution .ico file as a single, convenient package that holds several different sizes of your icon. It's like a container bundling 16x16, 32x32, and 48x48 pixel versions all into one favicon.ico file. This is incredibly important for making sure your icon always looks sharp, no matter where it appears.
Browsers and operating systems are smart enough to pick the best size for the job. A browser tab will grab the tiny 16x16 version, while a taskbar shortcut or a high-res display might pull the 32x32 one. Without these different sizes, a browser is forced to scale up a single small image, and the result is that blurry, unprofessional look we all want to avoid.
Any good favicon workflow relies on a tool that can generate these multi-resolution bundles. It’s a non-negotiable step for a polished user experience.
Should I Use ICO, PNG, or SVG for My Favicon?
The short answer? You should probably use all three. The modern best practice is to provide a comprehensive set of icons to cover all your bases, from brand-new browsers to legacy systems. Each format serves a specific, important purpose.
Here’s how they all work together:
- The
.icofile is your universal fallback. It guarantees your icon will show up on older browsers and in specific places, like some bookmark managers, that only look for afavicon.icofile in the root directory. - A PNG file is absolutely crucial for Apple devices. You'll need a 180x180 pixel PNG specifically for the
apple-touch-icon. This is what users see when they save your site to their home screen on an iPhone or iPad. - An SVG file is the top choice for modern, updated browsers. Since it's a vector, it scales perfectly to any resolution without losing quality, so it always looks crisp and clean.
By declaring each of these in your site's <head>, you let the browser choose the most suitable option. It’s the best way to ensure your brand always looks its best, no matter the context.
This layered approach is really the core of a professional favicon strategy. It’s not about picking one format over another; it’s about providing a complete toolkit so that browsers and operating systems never have to guess.
Why Is My Favicon Not Showing Up?
This is easily the most common and frustrating favicon issue, but it's usually caused by one of a few simple things. Before you start tearing apart your code or rebuilding your image files, run through these troubleshooting steps.
First, the most frequent culprit is aggressive browser caching. Browsers love to hold onto old favicons to save bandwidth. The very first thing you should always do is a hard refresh (Ctrl+F5 on Windows, Cmd+Shift+R on Mac) and completely clear your browser's cache.
Second, double-check your file path. A simple typo in the href attribute of your <link> tag is an incredibly common mistake. Make sure the path is correct relative to the root of your domain.
Finally, confirm the file is actually on your server. Open your browser's developer tools (F12), switch to the "Network" tab, and reload the page. If you see a 404 (Not Found) error for your favicon file, you know for sure the browser can't find it at the location you specified.
Ready to create a professional, secure favicon in seconds? The Digital ToolPad favicon generator runs 100% in your browser, so your brand assets stay private. Generate your multi-resolution ICO file instantly, with no uploads and no waiting. Try it now at https://www.digitaltoolpad.com.