A picture image resizer isn't just another utility—it's an essential part of any modern digital toolkit. When you optimize your images correctly, you're not just shrinking files; you're directly improving your website's performance, boosting user engagement, and crucially, protecting your data. For any business, picking the right tool isn't just a technical choice, it's a strategic one that can have a real impact on your bottom line.
Why Secure Image Resizing Is a Game Changer
In an era where visuals are everything, the size and security of your images can make or break the user experience. Every beautiful high-resolution photo or detailed product graphic adds digital weight that can bog down your website. Think about this: 53% of mobile users will leave a site if it takes more than three seconds to load. Those huge, unoptimized images are often the biggest culprits.
But it’s not just about speed. It's about delivering a smooth, professional experience from the moment someone lands on your page. A fast website keeps people around, which tells search engines that you're delivering value. That's why a good picture image resizer is a surprisingly powerful SEO tool.
The Privacy-First Advantage
Most online image tools ask you to upload your files to their servers. This is a huge red flag if you're dealing with sensitive material. Imagine a designer uploading confidential UI mockups for a new app, or a marketing team resizing unreleased product photos. Once those files are on a third-party server, you’ve lost control.
A privacy-first tool that runs entirely in your browser sidesteps this risk completely. All the processing happens right on your machine, so your files never leave your computer. It’s a simple concept, but it offers total peace of mind.
Here's a quick look at how these core benefits—speed, security, and engagement—all tie together.
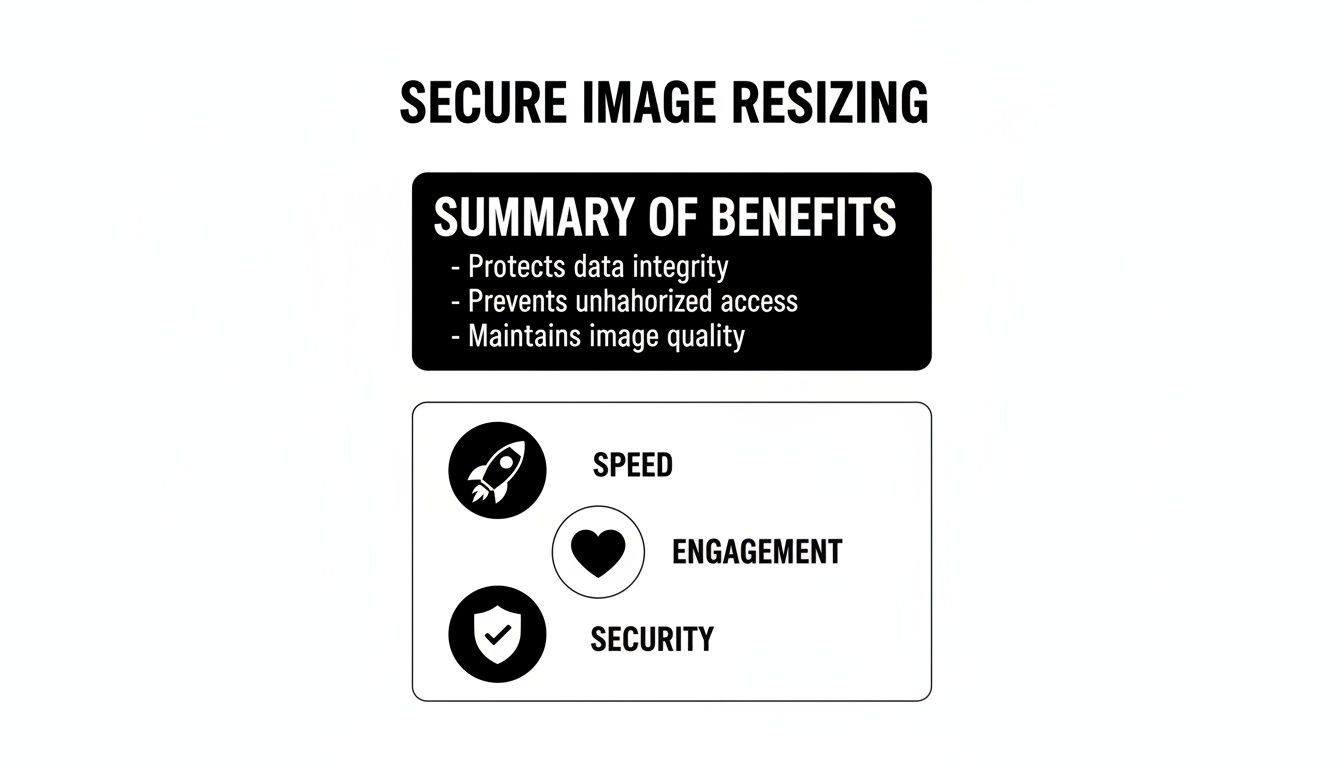
As you can see, these elements aren't isolated; they work together to build a stronger digital presence.
What the Market Is Telling Us
Our reliance on high-quality visuals is only growing. The photo editing software market is expected to expand by $606.1 million between 2024 and 2029. A massive 65% of this growth comes from e-commerce and other businesses, which makes perfect sense when you learn that 93% of all purchases are influenced by visual appearance.
An effective picture image resizer can compress files by 60-80% without a noticeable drop in quality, which is exactly what online stores need to keep their pages loading fast. You can discover more insights on the photo editing market in this detailed report.
To make the distinction clearer, here's a quick comparison of the two approaches.
Cloud vs Offline Resizer Comparison
| Feature | Cloud-Based Resizer | Offline Picture Image Resizer |
|---|---|---|
| Data Privacy | Files are uploaded to third-party servers, creating a potential risk. | All processing happens locally in your browser. Files never leave your device. |
| Security | Vulnerable to server breaches, data leaks, or unauthorized access. | Completely secure. Your data remains under your exclusive control. |
| Offline Access | Requires an active internet connection to upload and process files. | Fully functional offline. You can resize images anywhere, anytime. |
| Speed | Dependent on upload/download speeds and server processing times. | Instant processing. No upload/download delays. |
| Confidentiality | Not suitable for proprietary or sensitive images. | Ideal for confidential designs, mockups, and unreleased assets. |
The takeaway is simple: if you're handling anything you wouldn't want to be made public, an offline tool is the only sensible choice.
For teams working with proprietary designs, the peace of mind you get from a secure, local-first tool is invaluable. It shifts image resizing from being a potential security risk into a safe, routine part of your workflow.
At the end of the day, choosing the right tool is about more than just changing pixel dimensions. It’s about protecting your assets, boosting your site’s performance, and delivering a better experience for your users—all without ever compromising on data security.
Resizing a Single Image with Total Privacy
Let’s tackle a classic problem. You have a brilliant, high-resolution photo ready for your new blog post, but the file size is a beast. Uploading it as-is would drag your page load speed into the mud. Instead of sending that image off to some random cloud service, we’ll use a secure, browser-based picture image resizer to get the job done without your data ever leaving your computer.
Your first move is simply to select the image. When you use a privacy-first tool, you're not actually "uploading" anything to a server—you're just loading the file into your browser's local memory. That distinction is everything when it comes to security. Once loaded, you’ll get a preview and a handful of controls to work with.
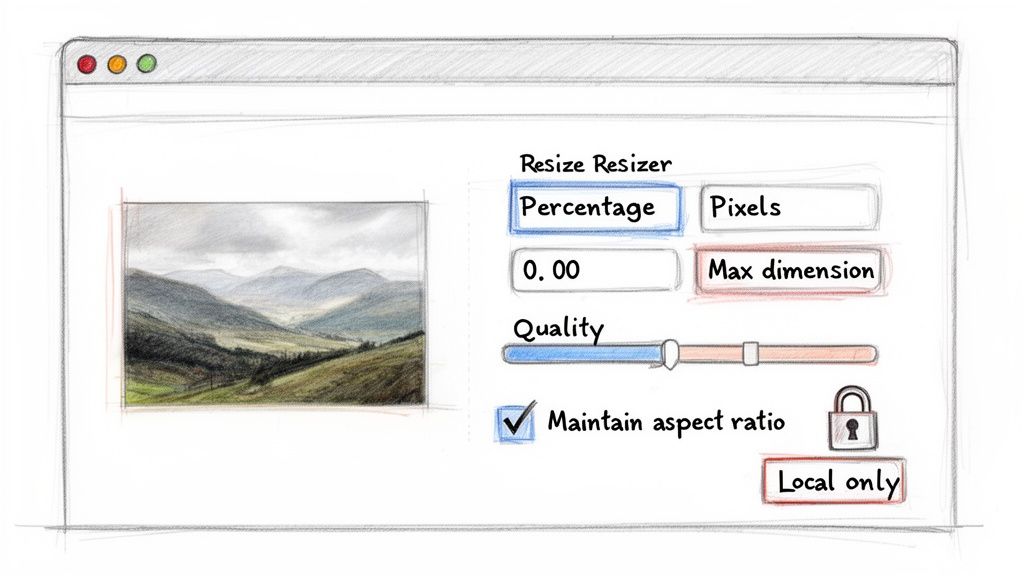
Choosing Your Resize Method
Okay, now you have to decide how you want to resize it. Most tools give you a few ways to approach this, and each one has its place.
- By Percentage: This is my go-to for quick, proportional tweaks. If I just need an image to be roughly half its original size, popping in 50% is the fastest way to do it.
- By Pixels (Width/Height): This is all about precision. If I know my blog's content column is exactly 800 pixels wide, I can lock in that width and know it will fit perfectly. No more guesswork.
- By Max Dimension: Here’s a smart one for when you’re dealing with a mix of portrait and landscape photos. Setting a max dimension of, say, 1200 pixels guarantees that neither the width nor the height will ever go over that number. It’s a great little time-saver.
For our blog post example, resizing by a specific pixel width makes the most sense. It gives us total control over how the image sits in the layout.
Here’s a pro tip I can’t stress enough: always keep the "Preserve Aspect Ratio" option checked. If you turn this off, you’re going to get a stretched, squashed, and completely unprofessional-looking image. Let the tool do the math to keep things looking right.
Fine-Tuning Quality and Saving
With the dimensions locked in, the last piece of the puzzle is quality. You'll usually see a slider ranging from 1 to 100. Dropping the quality shrinks the file size, but if you go too low, you’ll start to see ugly compression artifacts.
From my experience, a setting somewhere between 75 and 85 is the sweet spot. You get a massive reduction in file size, but the loss in visual quality is almost impossible to notice.
Once you’ve tweaked the slider, the tool should instantly update the new file size, showing you exactly how much space you've saved. When you're happy with the result, just hit download.
The entire process happens right there, inside your browser tab. The image is processed on your machine and handed back to you for download, never once hitting a third-party server. This is all possible thanks to client-side tech that handles data locally. If you're curious about how data can be securely managed right in the browser, it's worth reading about what Base64 encoding is and how it works. This privacy-first method means your unreleased product photos, sensitive internal documents, or personal pictures stay exactly where they belong: with you.
Mastering Batch Resizing for Large Projects
Working with a single image is straightforward. But what happens when you’re facing a mountain of them? Imagine getting a gallery of 200 product shots ready for a new e-commerce site or trying to standardize a folder packed with user-submitted photos. Going through them one by one isn't just tedious; it's a productivity-killing nightmare.
This is exactly where batch processing saves the day. A good picture image resizer lets you grab an entire collection of images and process them all in one go. You just drag in a folder, set your rules once, and let the tool handle the grunt work.
A Workflow Built for Efficiency
The principle is simple: apply the same rules to every file. This is how you achieve absolute consistency across a project, which is critical for a polished website, a professional photo gallery, or any user interface where visuals need to look uniform.
Think about a real-world scenario. You've got a folder of high-res images, and they all need to be web-ready.
- First, you’d just drag the entire folder and drop it into the resizer.
- Next, you define your settings for the whole batch—maybe a max width of 1024 pixels and a quality setting of 85%.
- Then, you hit one button to kick off the process.
- Finally, the tool packages all the resized images into a single zip file for a quick and easy download.
It's a "set it and forget it" approach that saves a ton of time.
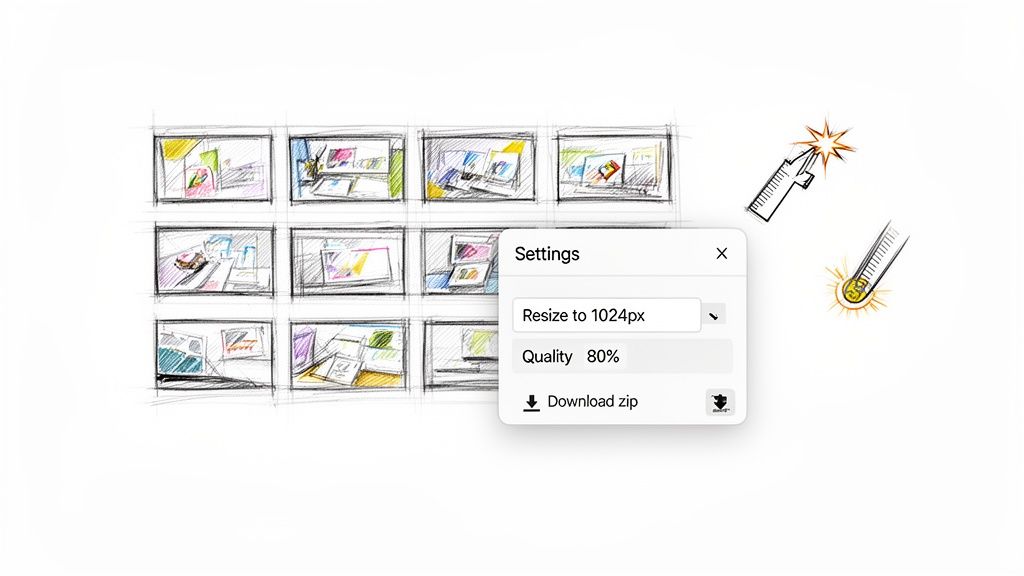
This kind of interface makes it incredibly simple to apply universal settings to every file you've uploaded, ensuring every image comes out exactly the same.
The Impact of Smart Batch Processing
The time you save is immediate and massive. A task that could easily eat up an afternoon of monotonous clicking can be wrapped up in just a few minutes. This kind of efficiency is why the photo resizer app market is expected to reach a $250 million valuation by 2025.
These tools are popular because they solve real problems. Batch resizing can slash file sizes by up to 70%, which is a huge deal when you know that getting page load time under 3 seconds can lift conversions by 32%.
For anyone working in development, using a deterministic tool for batch jobs is non-negotiable. It guarantees every single image is processed with the exact same logic. That means you get predictable, consistent files every time—something you absolutely need for automated build pipelines or content management systems.
When you're juggling a large number of files, using a dedicated bulk image resizer tool can completely change your workflow and give you back hours of your day. For any team regularly handling visual assets, learning this process turns a painful chore into a quick, effortless step in your routine.
Advanced Resizing Tips for Professional Results
Getting the pixel dimensions right is only half the battle. If you want truly professional results, you need to think about the file format, aspect ratio, and even the hidden data tucked away in your images. These details are what separate a quick, sloppy resize from a polished, optimized final product.
Making the right call on file format is a big one. It's not just some technical detail—it has a direct impact on your image's quality, how big the file is, and whether you can do things like use transparent backgrounds. Different formats are built for different jobs, and picking the right one is key.
Picking the Right Image Format
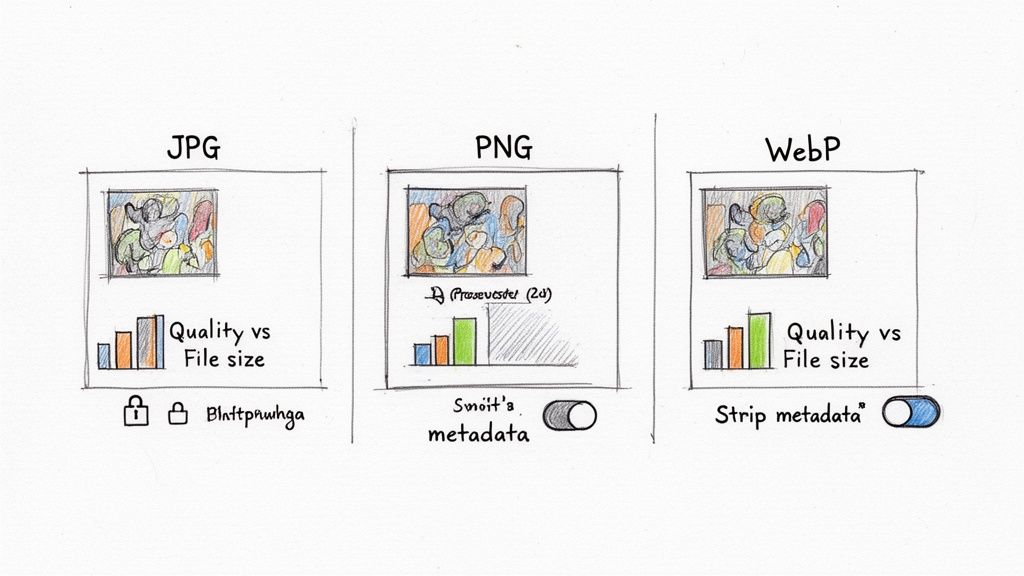
Think of image formats as different tools in your toolbox. You wouldn't use a hammer to turn a screw, and you shouldn't use a PNG for a complex photograph if you care about file size. Here’s a rundown of the big three you'll find in any good picture image resizer.
- JPG (or JPEG): This is your go-to for photographs. Its compression method is brilliant at handling the millions of colors and subtle gradients in a real-world photo. The only real downside? It can't handle transparency.
- PNG: Got a logo, text, or a graphic with sharp, clean lines? PNG is your best bet. Its most important feature is its ability to handle transparent backgrounds, which is essential for placing logos over colored sections on a website without a clunky white box.
- WebP: This is the modern all-rounder, developed by Google specifically for the web. WebP often delivers better compression than both JPG and PNG, giving you smaller files with comparable quality. Plus, it supports transparency. It’s a fantastic choice for nearly any web-based image.
To make this even clearer, I've put together a table outlining the best use cases for each common format.
Image Format Use Cases
This table should help you choose the best format at a glance, based on what you're trying to accomplish.
| Format | Best For | Key Characteristics |
|---|---|---|
| JPG | Photographs, images with complex gradients | No transparency, lossy compression, great for photo quality |
| PNG | Logos, icons, graphics with sharp lines | Supports transparency, lossless compression, larger files |
| WebP | All-purpose web images | Supports transparency, excellent compression, modern format |
| GIF | Simple animations, very basic graphics | Limited color palette, supports animation, outdated |
| SVG | Logos, icons (scalable vector graphics) | Infinitely scalable, code-based, not for photos |
Getting this right from the start saves you from having a beautiful photo that's a massive PNG file or a crisp logo that looks fuzzy because it was saved as a JPG.
The Non-Negotiable Rule of Aspect Ratio
Ever seen a photo on a website where people look weirdly stretched out or squished? That’s what happens when someone messes with the aspect ratio. The aspect ratio is just the relationship between an image's width and its height.
Preserving it is non-negotiable. Seriously. Any decent resizing tool will have an option like "Lock Aspect Ratio" or "Constrain Proportions" turned on by default. Turning it off is almost always a mistake that leads to distorted, amateur-looking images.
Handling Metadata for Privacy and Performance
Every single photo you take with a smartphone or digital camera embeds a ton of hidden information called EXIF data. This metadata can include things like:
- The camera make, model, and all the settings used.
- The exact date and time the picture was taken.
- Sometimes, even the precise GPS coordinates of where you were standing.
Stripping this metadata is a smart move for two big reasons. First, it protects your privacy by getting rid of sensitive location info. Second, it trims a few extra kilobytes from the file size, which helps your web pages load just a little bit faster.
A powerful picture image resizer will give you a simple checkbox to remove this data during the resize process. It's a small step that adds a nice layer of security and optimization. This same principle of optimization applies even to tiny images, which you can learn more about in our complete favicon generator guide.
For the more technically inclined, command-line tools like ImageMagick offer incredible power. You can write a single command to resize an image, strip its metadata, and convert its format all at once. For most of us, though, a browser-based tool gives a far more intuitive workflow without forcing you to give up these advanced features.
Why Privacy and Consistency Matter for Teams
For a solo user, resizing a picture is usually just a matter of convenience. But when you’re part of a larger team, especially in an enterprise or development environment, it becomes a serious question of security, compliance, and operational stability. Think about it—you're often handling sensitive assets like proprietary designs, confidential client data, or unreleased product photos. The last thing you want is to upload those files to a random third-party server.
That’s where an offline-first approach makes all the difference. By ensuring every resize, crop, and compression happens right inside your browser, the data never leaves your machine. This isn't just a "nice-to-have" feature; for organizations bound by strict regulations like GDPR or HIPAA, it's an absolute necessity. Your sensitive information stays firmly under your control, period.
Ensuring Data Compliance and Security
Digital image processing is a massive field, valued at an eye-watering $93.27 billion in 2024, and security is a constant headache. Considering that a staggering 82% of data breaches involve cloud storage, moving operations offline is a powerful defense. By keeping your images off external servers, you drastically shrink your attack surface and make compliance audits much simpler.
There’s a performance benefit, too. Teams that rely on local tools can cut latency by up to 40% compared to waiting on cloud APIs, which translates directly to better productivity. You can dive deeper into the growth of digital image processing on marketresearchfuture.com.
"When our team handles proprietary product designs, we can't afford any security risks. Using a local-first picture image resizer means we never have to worry about our intellectual property being exposed on a third-party server. It's not just a feature; it's a core part of our security posture."
The Importance of Deterministic Results
Beyond security, development teams live and die by predictability. We use the term deterministic to describe a tool that gives you the exact same output every single time you feed it the same input and settings. For anyone building automated workflows or content pipelines, this isn't just important—it's non-negotiable.
Picture a script that needs to resize thousands of product images for a mobile app. If the resizing tool produces slightly different outputs each run—even by a few pixels—it can cause chaos. You'd see inconsistent user interfaces, frustrating layout shifts, and spend hours debugging something that should have been simple. A deterministic tool guarantees that every image is processed with identical logic, giving you repeatable and reliable outcomes. This same need for consistency is just as critical in other tasks, like when you need a dependable QR code generator for business assets.
At the end of the day, a professional image resizer has to do two things perfectly: it must be a fortress for your sensitive data and a predictable engine for your automated processes.
Common Questions About Resizing Images
When you first get into resizing images, a few questions always pop up. Getting these sorted out early will help you work smarter and get much better results, whether you're tweaking one photo or prepping an entire gallery. Let's dig into the most common ones I hear.
One of the biggest worries is always about quality. Does resizing an image wreck it? The short answer is yes, any time you change an image’s dimensions, you’re messing with its pixel data. When you make an image smaller (downscaling), the software has to throw pixels away. When you try to make it bigger (upscaling), it has to invent new pixels out of thin air, which is what leads to that dreaded blurry look.
The real trick is to always, always start with the highest resolution source image you can get your hands on. From there, a good resizing tool can do a fantastic job of minimizing any visible quality loss, especially if it lets you control the final compression level. It's all about finding that sweet spot.
Does Resizing an Image Reduce Its Quality?
Yes, it does. Downscaling an image requires discarding pixel data, which inherently causes some quality loss, though a good algorithm can make this nearly invisible. Upscaling is even trickier because the software has to guess what the new pixels should look like, often leading to blurriness or artifacts.
The key is to start with the highest resolution image possible. Use a quality tool that offers control over the compression level to balance file size and visual fidelity.
What Are the Best Dimensions for Web Images?
There's no magic number here—it really depends on where the image is going to live on your website. But, based on my experience, here are a few solid starting points:
- Full-Width Hero Image: You can't go wrong with 1920 pixels wide.
- Blog Post Image: Somewhere between 800 and 1200 pixels wide is usually perfect.
- E-commerce Thumbnails: Think small, like 200x200 pixels.
The goal is simple: make the image just big enough for its largest intended display size and no bigger. Anything more is just wasted bandwidth that slows down your page.
Can I Resize Photos Without Installing Software?
Absolutely, and honestly, it's the best way to do it for quick tasks. Modern browser-based tools are a game-changer. A privacy-first resizer runs entirely on your machine, in your browser. Nothing gets uploaded, so you don't have to download a thing. For those looking for a versatile tool, the Picjam AI image resizer offers a modern solution to various image manipulation needs. This approach is not only convenient but also way more secure since your files never leave your computer.
How Does Batch Resizing Save Time?
Batch resizing is a lifesaver. Imagine you have a hundred photos for a new product gallery. Instead of opening, resizing, and saving each one individually, you can set a single rule—say, "make all images 800 pixels wide with 80% quality"—and apply it to the entire folder at once. It turns a tedious, hour-long job into a single click. It's a must-have for anyone dealing with more than a handful of images, ensuring everything is perfectly consistent with minimal effort.
Ready to resize your images with total privacy and unmatched speed? The Digital ToolPad suite of utilities runs 100% offline in your browser, ensuring your data never leaves your device. Try our secure picture image resizer today at https://www.digitaltoolpad.com.