
Building your own QR code generator is about more than just recreating a common utility. It's about creating a tool that runs entirely in the user's browser, which is a massive leap forward for both privacy and performance compared to most online options. This client-side approach guarantees that sensitive data, like Wi-Fi credentials or private URLs, never leaves the user's device.
Why Build Your Own QR Code Generator
So, why go to the trouble of building a custom QR code generator? It really boils down to three things: security, control, and performance.
The free online tools are handy, sure, but they come with a hidden vulnerability. When you paste your data into a typical web-based generator, that information gets sent to a third-party server to be processed. This opens up a huge privacy risk—your data could be logged, stored, or even intercepted.
For any developer working with confidential information, that's a deal-breaker. Think about encoding Wi-Fi credentials for a secure corporate network or creating a QR code for a private, unlisted video link. Sending that data off to some unknown server is an unnecessary and avoidable risk.
Gaining Full Control Over Data and Functionality
By building your own generator that runs completely on the client side, you cut out the server entirely. The whole process, from typing in the data to rendering the final QR code, happens right there in the user's browser. This local-first architecture is the foundation of a truly secure tool.
This approach gives you some serious advantages:
- Complete Data Privacy: Since nothing is transmitted over the network, user information stays 100% confidential. This is non-negotiable for apps in healthcare, finance, or internal corporate systems.
- Offline Capability: A browser-based generator can be built to work flawlessly without an internet connection after the initial page load. That makes it a dependable tool everywhere, from remote job sites to secure, air-gapped facilities.
- No Rate Limiting or Fees: You aren't at the mercy of a third-party API that might hit you with usage limits, subscription fees, or annoying ads. Your tool works on your terms, every time.
- Total Customization: You get to design the user interface, embed it perfectly into your existing workflows, and add specific features that off-the-shelf tools just don't offer.
A Practical Path Forward
This guide is your end-to-end roadmap for creating a secure, offline-first QR code generator using standard JavaScript. We'll walk through everything, from the core principles of QR code encoding to deploying a polished, ready-to-use tool. My goal is to give you the know-how to build a generator that puts you in complete control.
For those curious about the wider world of developer utilities, you can also explore other developer tools platforms to see a variety of useful applications. You can also get a deeper understanding of the technology by reading our guide comparing various QR and barcode generators: https://www.DigitalToolpad.com/blog/qr-barcode-code-generator. This context will help you build a fast, private, and reliable application for any use case you can dream up.
Understanding How QR Codes Work
Before you can build a solid QR code generator, you need to get your head around the mechanics of those familiar black and white squares. A QR code isn't just a random jumble of pixels; it's a highly structured, two-dimensional matrix designed for lightning-fast machine reading.
At its heart, a QR code uses a few key components to function. Those three large squares in the corners? They're called finder patterns, and they're what allow a scanner to orient the code instantly, no matter how it’s rotated. That smaller square, the alignment pattern, helps correct for distortion if the code is printed on a curved or uneven surface. The rest of the grid is just a sea of black and white modules that represent binary data.
This diagram really nails the core benefits of building your own client-side generator, focusing on the critical pillars of privacy, control, and offline functionality.
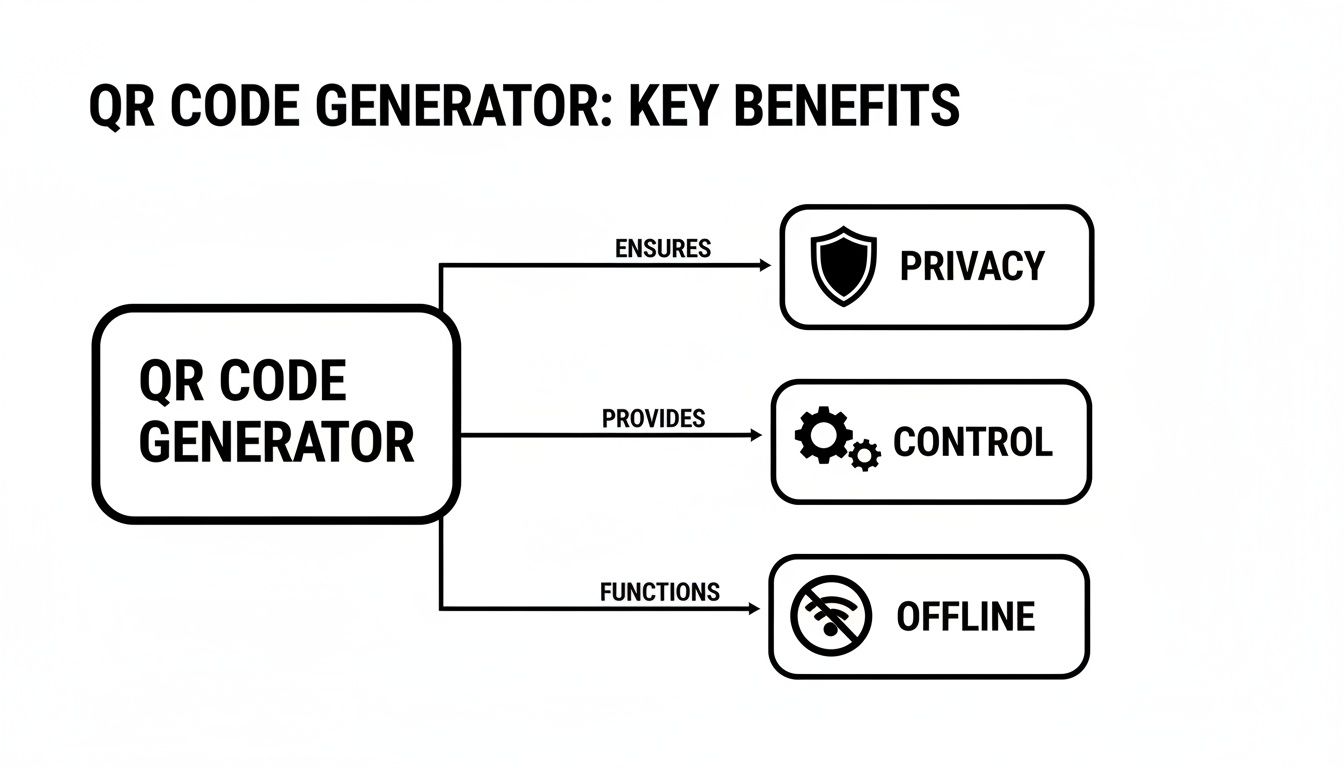
As you can see, these three principles are what set a professional, developer-built tool apart from the countless online services. Your tool guarantees data never has to leave the user's machine.
Breaking Down Data Encoding Modes
The way data gets packed into the code depends entirely on its encoding mode. Picking the right one is a game of efficiency, as it directly affects the QR code's final size and complexity. You’re not just dumping raw text into the matrix; you’re using an optimized format to save space.
There are four main modes you'll be working with:
- Numeric: The most compact mode, built exclusively for digits 0-9. It can cram in up to 7,089 characters, making it perfect for things like product IDs or serial numbers.
- Alphanumeric: A step up, this mode handles digits (0-9), uppercase letters (A-Z), and a handful of symbols ($, %, *, +, -, ., /, :, and a space). Capacity drops to 4,296 characters.
- Byte (Binary): This is your workhorse. It’s ideal for standard text using the ISO-8859-1 character set or any binary data. It holds up to 2,953 bytes and offers the most versatility.
- Kanji: As the name suggests, this is a specialized mode for Japanese characters, capable of storing up to 1,817 of them.
A smart generator doesn't just take the input and run. It first analyzes the content to select the most efficient encoding mode. For example, if a user enters "1234567890," using numeric encoding is vastly more efficient than defaulting to byte mode.
Understanding Versions and Data Capacity
A QR code's "version" determines its physical size and how much data it can hold. It starts with Version 1, a tiny 21x21 module grid, and goes all the way up to Version 40, a dense 177x177 grid. As the version number climbs, the code gets bigger and can store more information.
For developers, the key insight is that data density is everything. A Version 1 code using numeric encoding can hold just 41 digits, but a Version 40 code can hold a whopping 7,089. This incredible scalability is what makes QR codes so useful.
Your generator needs to be smart enough to calculate the minimum version required for the encoded data. This prevents it from creating a needlessly large and complex code that might be a pain for older phone cameras to scan. It's all about balancing data capacity with real-world scannability. This adaptability has fueled insane growth; the global QR Code Generator Market, valued at USD 1.02 billion in 2024, is on track to hit USD 2.95 billion by 2032, largely because the tech is now central to everything from marketing to payments. You can dig into the full research on this market growth to see the trends.
The Critical Role of Error Correction
Perhaps the most brilliant part of the QR code specification is its built-in error correction. This system, which relies on some clever Reed-Solomon algorithms, allows a code to be scanned successfully even if it's dirty, smudged, or partially covered up.
This is the magic that lets you slap a logo right in the middle of a QR code without breaking it. The error correction algorithms simply reconstruct the data from the obscured modules. There are four distinct levels of this, and choosing the right one is a trade-off between resilience and how much data you can store.
QR Code Error Correction Levels Explained
The table below breaks down the four levels. Think of it as choosing an "insurance policy" for your code's scannability.
| Level | Error Correction Capability | Ideal Use Case |
|---|---|---|
| L | Recovers ~7% of data | Clean, controlled environments with minimal risk of damage. |
| M | Recovers ~15% of data | General marketing materials, posters, and digital displays. |
| Q | Recovers ~25% of data | Industrial settings or public spaces with higher wear and tear. |
| H | Recovers ~30% of data | Mission-critical applications or codes with embedded logos. |
For most everyday uses, Level M hits the sweet spot. But if you know you're adding a logo or the code is going to live in a rough environment (like on a piece of machinery), bumping it up to Level H is the smart move. A great generator should absolutely let the user choose this level, giving them the power to create a code that's fit for its specific purpose.
Choosing the Right JavaScript Library
Alright, now that we've got the theory down, let's talk tools. You could, in theory, build a QR code encoder from the ground up, but why reinvent the wheel? The JavaScript world is full of fantastic open-source libraries that do all the heavy lifting for us. The real trick is picking the right one for our specific goal: a fast, secure, and entirely client-side qr code generator generator.
When I'm vetting a library, I'm looking at a few key things: its bundle size, whether it pulls in a bunch of other dependencies, how easy it is to work with, and what kind of customization it offers. For a tool that needs to work offline and feel snappy, a lean library with zero dependencies is the holy grail.
This isn't just a niche concern anymore. QR code usage is absolutely exploding, with projections showing a mind-boggling 323% growth between 2021 and 2025. We're talking about a technology used daily by over 2.2 billion people. If you're curious, you can discover more insights about these QR code statistics and see just how mainstream they've become.
Evaluating Popular Library Options
Let's break down a few of the usual suspects. Each has its own personality and is a good fit for different kinds of projects.
qrcode.js: This one is the old guard, a classic that’s been battle-tested for years. Its biggest selling point is that it's incredibly lightweight and has zero dependencies. That’s a massive plus for our offline-first requirement. The API is dead simple, making it perfect when you just need a QR code on the page without any fuss.qrious: A more modern take,qriousgives you a cleaner, promise-based API and more bells and whistles out of the box. You can easily tweak colors, padding, and error correction levels right in the options object. It strikes a great balance between simplicity and power.easyqrcode.js: Don't let the name fool you; this library is simple to use but surprisingly feature-rich. It has built-in support for adding logos, background images, and even creating those cool "artistic" dot-style QR codes. The trade-off? All those features mean a larger file size.
Honestly, for a core utility tool, I almost always find myself reaching for either qrcode.js or qrious. Their small footprint and proven reliability are exactly what you want for something that just needs to work, every single time.
Implementation and Code Snippets
Let’s see what this looks like in practice. Nothing beats seeing actual code. Here’s a quick example of how you’d get a basic QR code up and running with qrious, which is my personal go-to for its blend of features and developer experience.
First, you just need a canvas element in your HTML for the QR code to live in.
Then, the JavaScript side is refreshingly straightforward.
var qr = new QRious({ element: document.getElementById('qr-code'), value: 'https://www.digitaltoolpad.com', size: 200, level: 'H' // High error correction });
That's it. That little chunk of code is all it takes to get a QR code rendered. See that
leveloption? It maps directly back to the error correction levels we covered earlier. Having that kind of granular control is what lets you build a truly flexible and robust generator.
This simplicity is key because it means you can drop QR code generation into almost any web app or tool with minimal effort. If you're working inside a specific framework, it's always a good idea to see if there are dedicated wrappers or components available. For instance, developers in the React Native ecosystem might find a guide on something like the Expo QR Code to be a huge help.
At the end of the day, picking the right library is a balancing act between features, performance, and simplicity for your specific project.
Building the Client-Side Generator Interface
Alright, we've picked our JavaScript library. Now comes the fun part: rolling up our sleeves and actually building the interface for our QR code tool. This is where the theory of encoding and error correction meets the practical world of HTML, CSS, and JavaScript, turning abstract concepts into a functional, user-friendly generator that lives entirely in the browser.
Our goal is a clean, intuitive interface that just works. No fluff, no confusion.
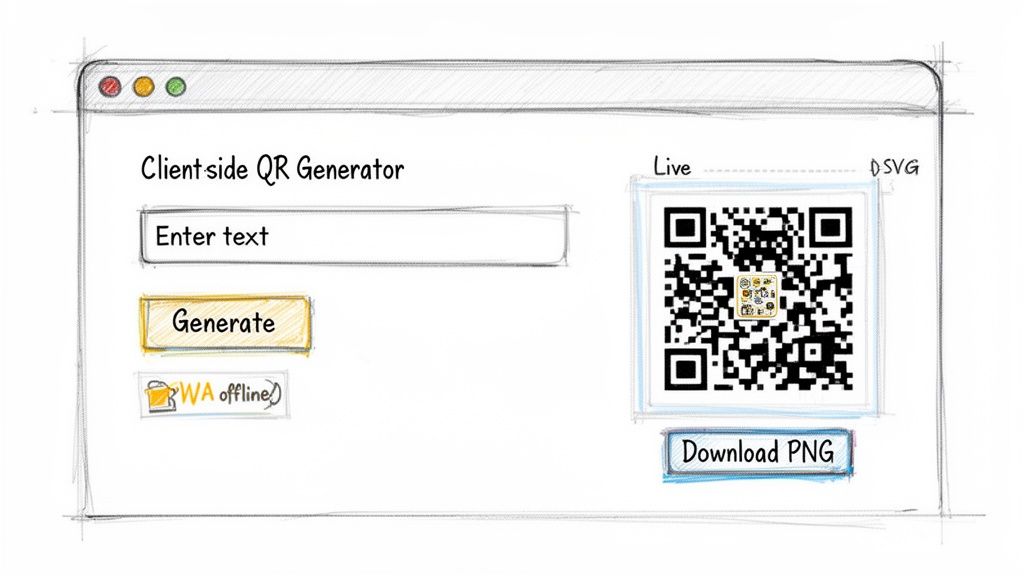
This sketch really nails the core of what we’re aiming for: a simple input for the user's data, a container where the QR code appears instantly, and some basic controls. The real magic here is in the simplicity and immediate feedback.
Structuring the HTML Foundation
First things first, we need a solid skeleton to hold our application. I like to keep this part minimal, focusing on just three essential components: an input field for text, a container where the QR code will be rendered, and a button to let the user download the final image.
Here’s a simple but effective HTML structure to get started:
This structure is clean and easy to work with. The <textarea> gives users enough room for longer inputs like URLs or vCard data. The qr-output div is our canvas, and the download-btn starts as disabled—a small but important UX touch since there's nothing to download yet.
Implementing the Core Generation Logic
Now let's breathe some life into it with JavaScript. The core of our tool is a function that listens for changes in the text input and tells the QR code library to generate a new image in real-time. This instant feedback loop is what makes a great client-side tool feel so responsive.
Using a library like qrious, the logic is surprisingly clean. We just need to attach an event listener to the text-input field that fires whenever the user types.
const textInput = document.getElementById('text-input'); const qrOutput = document.getElementById('qr-output'); const downloadBtn = document.getElementById('download-btn');
textInput.addEventListener('input', () => { qrOutput.innerHTML = ''; // Clear the old code first if (textInput.value) { new QRious({ element: qrOutput, value: textInput.value, size: 250, level: 'H' // High error correction }); downloadBtn.disabled = false; // Enable the button } else { downloadBtn.disabled = true; // Disable if input is empty } });
This snippet is doing a few critical jobs. It clears the old QR code on each keystroke, generates a new one as long as the input isn't empty, and only enables the download button when there’s a valid code to save.
A key takeaway here is the focus on user experience. Disabling the download button when the input is empty prevents user confusion and potential errors. It's a small detail, but these thoughtful touches are what separate a quick script from a polished tool.
Handling Output Formats SVG vs PNG
One of the most important decisions you'll make is the output format for the QR code. Your two main contenders are SVG (Scalable Vector Graphics) and PNG (Portable Network Graphics), and they each have their place.
- SVG: This is a vector format, meaning it's drawn with math, not pixels. You can scale it up to the size of a billboard with zero quality loss, making it perfect for high-resolution printing or sharp display on any screen.
- PNG: This is a raster format, a grid of pixels. It’s universally supported everywhere but will get blurry or pixelated if you stretch it beyond its original dimensions.
For a web-based generator, I almost always lean toward rendering to SVG first. Its scalability and crispness are unbeatable. Many libraries, including qrious, default to rendering on an HTML <canvas> element, which you can easily convert to a PNG data URL for downloading. This gives you the best of both worlds: a sharp on-screen display and a download format that everyone can use.
Enabling Offline Functionality with a PWA
To make our generator truly self-sufficient and align with the privacy-first approach of platforms like Digital ToolPad, we should build it as a Progressive Web App (PWA). This might sound complex, but it’s surprisingly straightforward and delivers a massive win: offline functionality.
By adding a simple service worker and a web app manifest file, you can cache the core HTML, CSS, and JavaScript. Once a user visits your tool for the first time, it can load and run perfectly even without an internet connection. This is a game-changer for developers in low-connectivity environments or anyone working within a secure, air-gapped network.
This client-side, offline approach is more important than ever. The QR code payment market alone hit USD 14.7 billion in 2024 and is projected to reach USD 38.2 billion by 2030, fueled by its growing role in payments and marketing. To see the full scope of this growth, you can discover more insights about these QR code statistics. Building a tool that works reliably offline caters directly to this expanding, mission-critical market.
In the end, by combining a simple HTML structure, responsive JavaScript logic, and the offline power of a PWA, we've created a high-performance, self-contained QR code generator that fully respects user privacy. This perfectly matches the philosophy behind powerful, browser-based utilities like the Digital ToolPad QR code generator.
Fine-Tuning Your Generator: Advanced Tips and Best Practices
Getting a basic QR code generator up and running is one thing. But turning that script into a robust, professional-grade tool? That’s where the real craftsmanship comes in. It's about paying attention to the details—performance, accessibility, and security—that separate a quick demo from a reliable utility you'd trust in an enterprise environment.
Let's dig into some of the practices I've found make a huge difference in real-world applications.
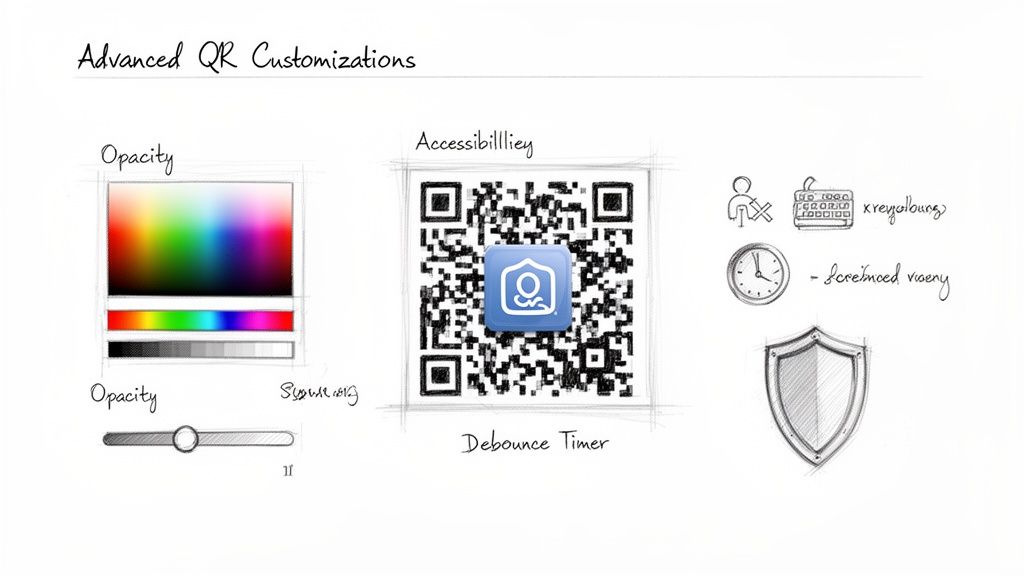
Stop Wasting Cycles: Optimize with Debouncing
Right now, our generator probably re-renders the QR code on every single keystroke. It feels snappy, but it's incredibly inefficient. Think about it: if someone types a 50-character URL, you're generating nearly 50 QR codes when you only needed the last one. That's a lot of wasted CPU cycles.
The smart way to handle this is with debouncing.
This technique simply waits for the user to pause typing for a brief moment—say, 300 milliseconds—before it actually runs the generation code. The result is a tool that feels just as responsive but doesn't bog down the browser, which is a big deal on older hardware or mobile devices.
Implementing a debounce is straightforward. Here’s a quick look at the logic:
let debounceTimeout;
textInput.addEventListener('input', () => { // Clear any existing timer clearTimeout(debounceTimeout);
// Set a new timer debounceTimeout = setTimeout(() => { generateQRCode(textInput.value); // Your actual QR generation function }, 300); }); This small change makes a massive difference in performance without sacrificing the user experience.
Stay Offline, Stay Secure: A Client-Side Promise
The most critical security feature of our tool is its simplicity: it works entirely in the user's browser. No data ever hits a server. This is the bedrock of a privacy-first tool like Digital ToolPad, and it’s a promise you have to keep.
Never, ever add a feature that sends user input over the network. The moment you introduce a server-side call for processing, logging, or anything else, you’ve broken the fundamental trust your users have in the tool.
This strict client-side architecture isn’t just a nice-to-have; it's non-negotiable, especially when users might be encoding sensitive data like Wi-Fi credentials or internal links. Sticking to this principle is core to building secure software. For a broader look at this topic, I recommend reading up on software development security best practices that apply to almost any project.
Build for Everyone: Improving Accessibility
A truly professional tool is one that everyone can use, including people who depend on assistive technologies like screen readers. Good accessibility isn't an afterthought; it’s a hallmark of quality engineering.
Here are a few high-impact changes you can make:
- Label Your Inputs: Use
aria-labelattributes on your controls. Your text field, for instance, should have a clear label likearia-label="Enter text or URL to encode in the QR code". - Mind the Keyboard: Make sure every interactive element, like the download button, is focusable with the Tab key. Crucially, its disabled state should be clearly announced by screen readers.
- Communicate Status: Don't just show a broken image if generation fails. Provide a clear, text-based error message. You can also use an
aria-liveregion to announce when the QR code has updated successfully, which is a huge help for visually impaired users.
These aren't complicated fixes, but they fundamentally change how usable your tool is for a significant portion of your audience.
Get Creative: Embedding a Logo
One of the coolest and most-requested features is adding a logo to the center of a QR code. This is where our knowledge of error correction really pays off. By cranking the error correction level up to 'H', the QR code can withstand up to 30% of its data being obscured and still scan perfectly.
Here’s my field-tested checklist for doing it right:
- Set Error Correction to 'H': This is non-negotiable. It gives you the necessary redundancy to cover a part of the image.
- Size the Logo Carefully: As a rule of thumb, the logo shouldn't cover more than 20-25% of the QR code. Push it further, and you risk scanners failing.
- Center It: Placing the logo squarely in the middle is the safest bet, as it avoids interfering with the critical finder patterns in the corners.
- Test, Test, and Test Again: Once your logo is in place, scan it with everything you can get your hands on—different phones, different apps, different lighting. Confirm it works reliably before you ship it.
Adding this feature elevates your generator from a simple utility to a powerful branding tool, letting users create professional assets that stand out.
Common Questions About QR Code Generators
When you start building your own QR code tools, you'll inevitably run into the same handful of questions that trip up most developers. It's one thing to understand the basics, but another to handle the finer points that make a generator robust and reliable.
Let's dive into those common sticking points—offline functionality, image formats, and safely embedding a logo. These aren't just theoretical answers; they come from real-world experience building these tools from the ground up.
Can My Generator Work Completely Offline?
Yes, and honestly, it really should. The whole point of a client-side generator is to achieve 100% offline functionality. This is completely doable by choosing a JavaScript library that runs all its encoding logic right in the browser, without making any external network calls.
Once the page loads, the tool is self-contained. This is a massive win for privacy and security because it guarantees user data—sensitive or not—never leaves their machine. The QR code itself is just a visual representation of data; no internet is needed to create it. The only time the web comes into play is if the QR code contains a URL meant to be opened.
SVG vs. PNG: Which QR Code Format Is Better?
This classic debate comes down to one key difference: vectors versus rasters. Your choice here directly impacts how the final QR code can be used, especially when it comes to resizing.
- SVG (Scalable Vector Graphics): This is a vector format, meaning it's drawn with mathematical coordinates, not pixels. You can scale an SVG to the size of a billboard or shrink it to a tiny icon, and it will remain perfectly sharp every single time. For high-resolution printing or crisp web displays, SVG is the way to go.
- PNG (Portable Network Graphics): This is a raster format, a grid of pixels. While it has great support everywhere, it gets blurry and pixelated if you try to scale it up beyond its original size. It’s a solid choice for simple on-screen use where the dimensions are fixed.
My advice? For a web-based generator, render the QR code as an SVG on the page. It looks better on screen. Then, offer a download option that converts the SVG to a PNG for users who need a standard image file. Best of both worlds.
How Do I Safely Add a Logo to My QR Code?
Adding a logo without making the code unscannable is all about working with its built-in error correction, not against it. You're deliberately covering up data, so you need to give scanners enough backup information to piece together what's missing.
The secret is to max out the error correction. Always use Level 'H', which allows the code to function even if up to 30% of its data is unreadable. This gives you the wiggle room you need for branding.
Here’s how to do it right:
- First thing's first: set the error correction to 'H'. This is non-negotiable.
- Make sure your logo is dead center in the QR code.
- Keep the logo's size in check. Covering no more than 20-25% of the total area is a safe bet.
- Most importantly, ensure the logo doesn't cover any of the three large "finder patterns" in the corners. The scanner needs those to orient itself.
Once you’ve generated the code, test it. And I mean really test it. Use different phones, different scanner apps, and try it from various angles and distances.
Is It Secure to Use an Online QR Code Generator?
The security of any online generator boils down to its architecture. Many free web tools send your data to their servers for processing, which can be a huge privacy risk. You have no idea if they're logging, storing, or even analyzing the information you encode.
If you're just encoding a public URL, the risk is pretty low. But for anything confidential—like Wi-Fi credentials, private contact details, or internal business data—using a server-based generator is a serious liability. This is the exact reason why building a client-side, offline-first tool is the only way to go for any developer or company that takes data security seriously.
Ready to build with tools that prioritize your privacy? Digital ToolPad offers a suite of powerful, 100% offline utilities that run entirely in your browser. From text processing to data conversion, our tools ensure your data stays yours. Check out our privacy-first tools at https://www.digitaltoolpad.com.