
A client-side random name wheel picker is a simple but powerful web app built with just HTML, CSS, and JavaScript. It does everything right inside your browser. This means no server connection is needed, so any information you use—like names for a giveaway—stays completely local and private on your machine.
Why a Client-Side Name Picker Matters
When you first think about a random name wheel, the "how" behind it probably doesn't seem like a big deal. But for developers or anyone who cares about privacy, the difference between a server-based tool and a client-side one is night and day.
Most online wheels make you send your list of names across the internet. That list gets processed on someone else's computer, and then the result is sent back to you. This back-and-forth adds a bit of lag, but the bigger issue is privacy. Who owns that server? What happens to your data once you upload it? For a teacher picking a student, maybe it’s not a huge concern. But if you’re a manager running a confidential team raffle, sending that list to a random third-party service is a risk you just don't need to take.
The Power of Local Processing
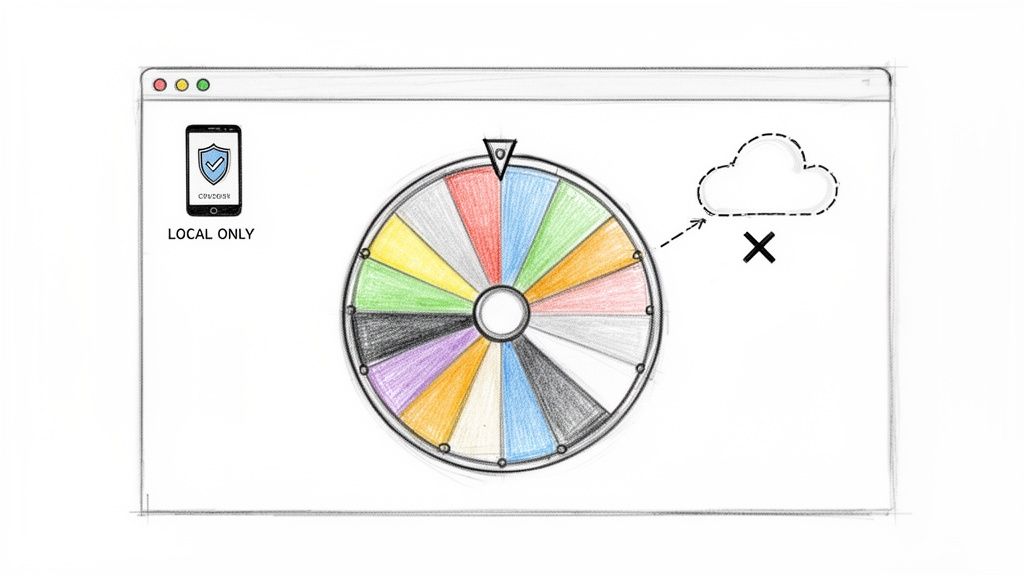
Running the entire application on the client-side solves these problems instantly. By keeping all the logic inside the user's browser, you create a totally secure and self-contained environment. The benefits are clear and compelling:
- Zero Data Exposure: Every piece of data—employee names, project codenames, or just a simple list of tasks—never leaves the local machine. It’s never transmitted anywhere.
- Offline Functionality: Once the page loads, you don't need an internet connection. The tool just works, whether you're on a plane or in a basement with spotty Wi-Fi.
- Instant Performance: With no network latency to worry about, the wheel spins and gives you a result immediately. It feels snappy and responsive.
- No Compliance Headaches: For any business, this approach is a huge win. You completely bypass complex data privacy regulations like GDPR because you never actually process anyone’s personal data on a third-party server.
To put it in perspective, let's look at a quick comparison.
Server-Side vs Client-Side Wheel Picker Comparison
This table breaks down the fundamental differences between a typical online name picker and the local-first approach we're building.
| Feature | Server-Side Picker | Client-Side Picker (Our Approach) |
|---|---|---|
| Data Privacy | Data is sent to a remote server, creating a privacy risk. | Data stays on your device. No transmission, no risk. |
| Internet Requirement | Requires a constant connection to function. | Works offline after the initial page load. |
| Performance | Subject to network latency; can feel sluggish. | Instantaneous. All processing happens locally. |
| Security | Dependent on the server's security measures. | Inherently secure; operates in a sandboxed browser environment. |
| Complexity | Involves backend logic, APIs, and server maintenance. | Simple and self-contained (HTML, CSS, JS only). |
As you can see, the client-side model offers a more robust, private, and reliable solution for what should be a simple utility.
The core principle is simple: your data should never leave your device unless absolutely necessary. A client-side random name wheel picker embodies this philosophy, offering a powerful demonstration of how to build secure, reliable, and user-respecting web utilities.
When you're building any app, especially one that runs entirely on the client, it's good practice to be transparent about how you handle (or in this case, don't handle) user data. It's all part of understanding privacy policies from a developer's perspective.
This project isn't just about a fun spinning animation; it’s a hands-on lesson in creating privacy-first tools. And for developers who need deterministic results for testing, our approach can be easily adapted to produce repeatable outcomes—much like how a UUID generator creates unique but predictable IDs when given the same input seed. That’s a key feature for any professional toolkit.
Building the Wheel: HTML and CSS
Before we get to the fun part—making the wheel spin—we need to build it. Every web project starts with HTML to create the basic structure, and a clean, semantic layout here will save us a lot of headaches when we start wiring things up with JavaScript.
We'll begin with a simple HTML file. All we need is a main container for the whole app, a div for the wheel itself, another for the static pointer that shows the winner, and a spot for user controls like the name input box and the "Spin" button. Keeping these pieces separate is just good practice and makes styling much simpler.
The HTML Skeleton
I like to start with the bare minimum and build up from there. We'll have a main wrapper, the pointer, the wheel, and a separate container for our controls. This kind of logical separation keeps the code tidy and easier to read.
Here’s what that looks like:
This simple setup gives us clear targets for our CSS. The .wheel-container will handle centering, the .wheel-pointer will become our arrow, and .wheel-spinner is where the real action will be. The .controls-container just holds the user-facing bits.
Designing the Wheel with Conic Gradients
Now, let's make it look like an actual prize wheel. The trickiest part is creating all those colorful segments. You could try to create a bunch of triangular div elements and position them with transforms, but that's a nightmare to manage.
A much better way is to use a modern CSS feature: conic gradients.
A conic gradient is perfect for this. It sweeps colors around a central point, like the hands on a clock. By creating hard stops between colors, we can generate those sharp, pie-like segments. The best part? We can create a wheel with any number of segments using just a single CSS property on a single div.
For instance, if we wanted a simple four-segment wheel, the CSS would be this straightforward:
.wheel-spinner { width: 400px; height: 400px; border-radius: 50%; background: conic-gradient( red 0% 25%, blue 25% 50%, green 50% 75%, yellow 75% 100% ); }
This tells the browser to fill the first quarter of the circle with red, the next with blue, and so on. In the next section, our JavaScript will generate this gradient on the fly based on how many names the user enters.
The real power of
conic-gradientis its scalability. Whether you have 2 names or 50, the CSS is still just one line. This is way more performant and maintainable than messing with dozens of individual DOM elements.
Finally, we just need to style the pointer. It's usually just a small triangle positioned over the edge of the wheel. We'll use absolute positioning to stick it right at the top, ready to point to the winning segment. With this visual foundation set, we’re ready to bring it to life with JavaScript.
Animating the Spin with JavaScript Logic
Alright, we've got the static structure and styling down. Now for the fun part: making the wheel actually spin. This is where JavaScript takes the stage, handling everything from user input to the final, dramatic animation. It’s the engine that turns our static HTML and CSS into a genuinely interactive tool.
First things first, we need to grab the list of names. The user will dump them into a textarea, so our initial task is to write a function that reads that input, splits it into an array, and—importantly—cleans it up by filtering out any blank lines. This clean array is now the single source of truth for building our wheel.
With that array in hand, we can dynamically generate the conic-gradient we planned earlier. The math is straightforward: 360 degrees divided by the number of names gives us the size of each slice. We'll loop through our names and colors to build the final CSS conic-gradient string, then apply it directly to our .wheel-spinner div. Just like that, a static element becomes a custom-colored wheel, ready for action.
This three-part process—structure, style, and animation—is a classic workflow you'll see over and over when building interactive components on the web.
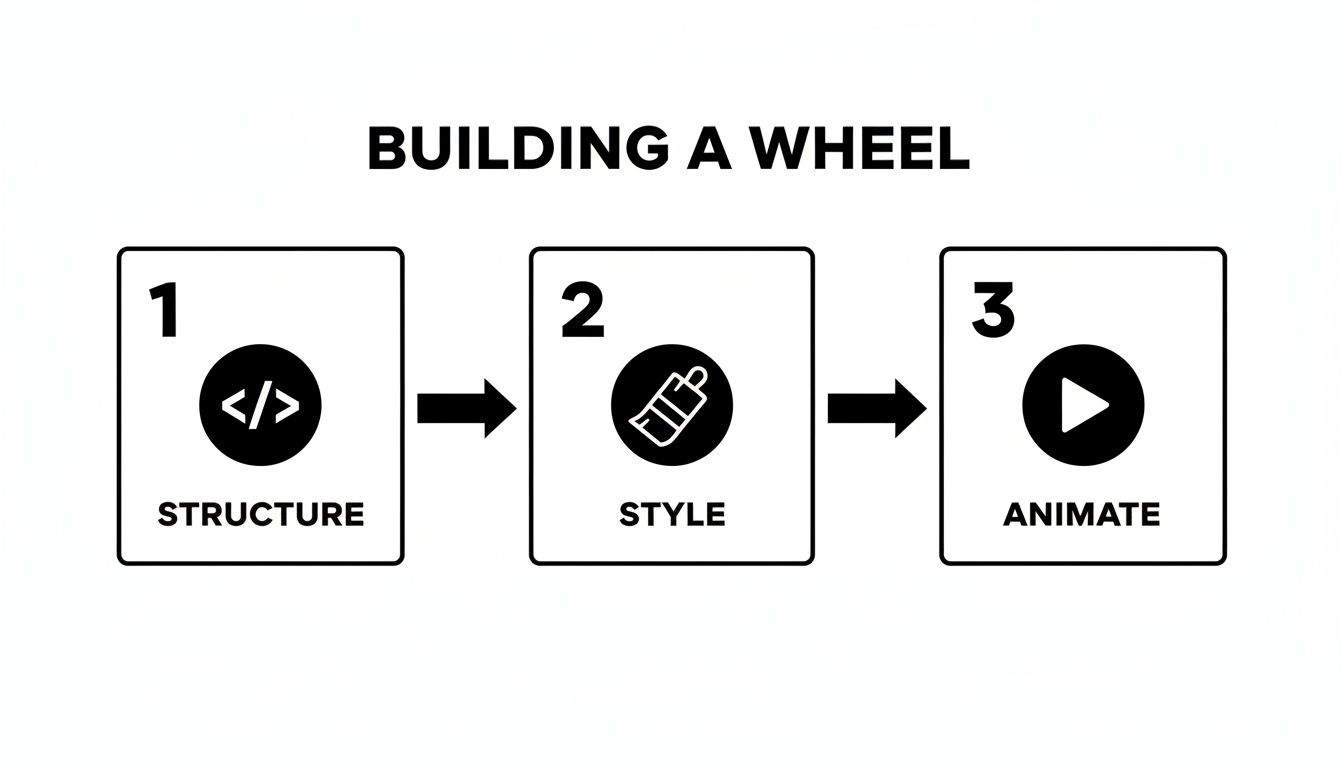
The image really drives it home: a solid HTML foundation is essential, CSS adds the visual flair, and JavaScript brings it all to life with interactivity.
Calculating the Winning Spin
The entire "random" part of our picker hinges on one powerful line of code: Math.random(). This function hands us a pseudo-random number between 0 and 1, which is all we need to figure out where the wheel will land.
But we don't want the wheel to just jump to the final position. That’s boring. To build anticipation, we'll make it spin a few times first.
Here's the approach I’ve settled on after building a few of these:
- Set a Base Rotation: I like to add a bunch of full rotations, something like
5 * 360degrees. This guarantees the wheel spins for a few seconds, which feels much more satisfying for the user. - Find the Random Offset: Next, we multiply
Math.random()by 360. This gives us a random degree value that will determine the final winning slice. - Combine for the Total Spin: Finally, just add the base rotation and the random offset. This final number becomes the target for our
transform: rotate()property.
This simple method ensures every spin is a dramatic, multi-rotation event while keeping the final outcome completely unpredictable.
Applying Smooth Animation and Easing
Of course, just snapping the wheel to its final rotation angle would look terrible. We need a smooth, fluid animation. This is a perfect job for CSS transitions. By adding a transition property to our wheel element, we tell the browser to automatically animate any changes to its transform property over a set duration.
One small detail that makes a huge difference in the feel of the animation is the
transition-timing-function. Instead of a boringlinearspeed, usingease-outmakes the wheel start fast and gradually slow to a stop. It mimics real-world physics and just feels right.
So, when the user hits the "Spin" button, our JavaScript function does its calculations and sets the new rotation value on the wheel's style. The CSS transition engine handles the rest, executing a beautiful, smooth animation without any more work from us.
Determining the Winner
Once the spin animation finishes, we have one last job: figuring out which name the pointer landed on. This comes down to a bit more math. We have the final rotation angle and we know how big each segment is.
The logic looks something like this:
- Take the final rotation angle and use the modulo operator (
% 360) to normalize it to a value within a single circle. - Divide this normalized angle by the size of each segment (
segmentAngle). - Use
Math.floor()on the result to get the zero-based index of the winning segment.
That index corresponds directly to a name in our original array. From there, we can pop up an alert or highlight the winner's name on the screen. The recent explosion of online wheel pickers lines up with a huge interest in personalized data visualization. For example, US baby name data from 1880-2020 shows incredible shifts; 'Emma' went from rank 488 in 1979 to #2 by 2020 with 15,310 births—that's a 1,200% relative climb. For developers and security teams at Digital ToolPad, building offline tools like this means these kinds of stats can be generated locally, ensuring total privacy for sensitive data like employee rosters. To see more of these trends, check out the fantastic visualizer from Engaging Data.
Pushing Beyond the Basics: Advanced Features and Customization
A simple random name wheel is a good starting point, but let's be honest, the real magic happens when you add features that give users genuine control and a better experience. To take our wheel from a quick novelty to a professional-grade utility, we need to think beyond just the spin. It’s about building something robust, customizable, and dependable.
One of the most important upgrades for any serious developer tool is enabling deterministic outcomes. Sure, Math.random() works for a quick, unpredictable spin, but for testing, demos, or situations where you need to reproduce a result, it falls short. This is where a seeded pseudo-random number generator (PRNG) becomes invaluable. By feeding it a specific "seed"—any string or number—the PRNG spits out the exact same sequence of "random" numbers every single time. For a given list of names and a given seed, the winner will always be the same. It's a game-changer for debugging and validation.
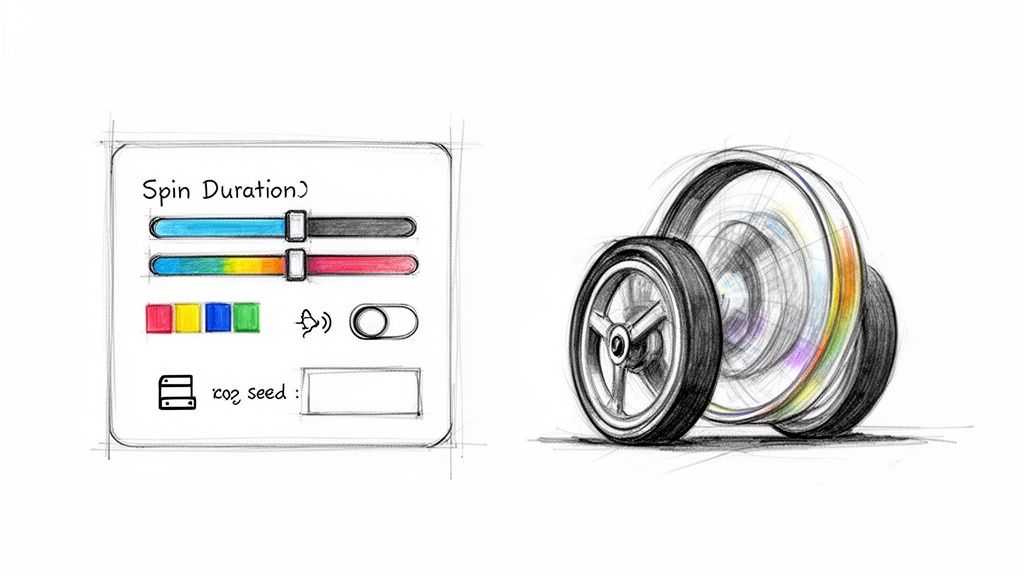
Next up, let's give the user some control over the look and feel. People love to tweak things to their liking.
- Adjustable Spin Duration: Let users decide how long the animation runs. A snappy, quick spin is perfect for rapid-fire selections, but a longer, more dramatic spin can build suspense for a big giveaway.
- Custom Color Schemes: Instead of hardcoding colors, allow users to define their own palette for the wheel segments. This is great for matching a company's brand or just for fun.
- Sound Effects: A little audio feedback goes a long way. Think a classic ticking sound as the wheel spins and a satisfying chime when it lands on a winner. To get really creative, you could even use an AI sound effect generator to produce unique audio cues that make the experience more memorable.
These kinds of options are what separate a simple script from a truly versatile tool.
Making the Wheel Smarter with Local Storage
Nothing is more tedious than having to re-enter the same list of names every time you want to use the wheel. We can fix this with a simple but powerful browser feature: the localStorage API. This lets us save the user's name list right in their browser.
All it takes is a couple of small functions. One function saves the list to localStorage whenever it's updated, and another loads it back when the page first opens. Suddenly, the experience is persistent. A user can close their browser, come back the next day for a daily stand-up, and their team list is right there waiting. It’s a minor coding effort that delivers a massive improvement in usability.
This focus on local data is a core principle for developers building reliable internal tools. It's just as fundamental as knowing how to generate UUIDs and GUIDs for unique identification.
This offline-first approach is incredibly powerful. For the devs and IT admins who use Digital ToolPad, a local-first picker means they can access their tools without an internet connection and without sending any data to a server. This is a huge win for enterprises concerned about GDPR and data privacy. It also guarantees instant performance, whether you're spinning a wheel with team member names or generating mock user data for a test environment.
By building in features like deterministic randomization, user customization, and local storage, our basic spinner evolves into a powerful, reusable utility. It’s no longer just a toy; it’s a professional tool that meets the expectations of developers who need things to be robust, predictable, and efficient.
Integrating with Other Offline Workflows
A great tool really proves its worth when it plugs neatly into your existing processes. Our privacy-first random name wheel picker wasn't designed to be just a standalone gadget. Think of it as a component meant to slot into a larger, secure, and completely offline workflow. The real magic happens when you chain it with other single-purpose utilities to get a job done without ever sending sensitive data over the internet.
Let's walk through a common scenario for a project manager. You've just exported a raw CSV file of team members from your project management system. It’s a bit of a mess—full of email addresses, IDs, and other columns you don't need for a simple prize draw. Instead of uploading that file to some random web-based cleaner, you can use an offline data utility to pull out just the names column.
A Practical Workflow Example
Once you have that clean list of names copied to your clipboard, the next step couldn't be simpler. You just paste the list directly into our client-side random name wheel picker. In a matter of seconds, you can spin the wheel to pick someone for a special project, a peer review, or a fun giveaway. The best part? Not a single byte of that data ever touched an external server.
This whole process demonstrates a core philosophy behind the Digital ToolPad suite:
- Start with your raw data: Begin with a local file, like a CSV or text document sitting on your computer.
- Process it offline: Use a dedicated offline tool to clean, filter, or transform that data into what you need.
- Use the output: Feed the clean data directly into another offline tool, like our wheel picker, for the final task.
The entire sequence—from raw, messy data to a random, fair selection—happens entirely within the safety of your own browser. It’s a powerful, self-contained system that puts you in control of your data and wipes out compliance headaches.
Broadening the Use Cases
This model works for so much more than just picking names. For example, developers can use this same pattern for brainstorming or building out prototypes. The Social Security Administration has been tracking baby names in the US since 1880, and that massive dataset is a goldmine for inspiration. With privacy-first tools, teams can simulate name distributions without server pings, quickly seeing how name rarity follows a power law—the top 10 names often make up 10-15% of all births each year. You can dive deeper into these trends over at Engaging Data.
By chaining these kinds of tools, you effectively create a versatile, local-first development environment. You could use one offline utility to generate test data, then another to visualize its distribution or select random samples from it. Whether you're planning team-building exercises or need to create dynamic QR codes for an internal event, this modular approach keeps your processes efficient and fundamentally secure. You can see how our QR code generator also fits perfectly into this secure, offline-first mindset.
Got Questions? I've Got Answers
Whenever I'm working on a new project like this, a few questions always seem to come up. Let's tackle some of the common ones developers ask when building their own client-side random name wheel picker.
Is This Thing Actually Random?
That’s a great question. The short answer is no, not in a truly random, unpredictable way. JavaScript's Math.random() function is what we call pseudo-random. It runs on a predictable algorithm that's just designed to look random, which is more than good enough for what we're doing here.
For picking a name for a giveaway or a classroom activity, this level of randomness is perfect. If you were building something that required serious, cryptographic-level security, you'd want to reach for window.crypto.getRandomValues(). But for a fun, visual tool? Math.random() is the right tool for the job.
How Do I Make Sure Screen Readers Can Use It?
Accessibility isn't an afterthought; it's a core part of building a good tool. Making the wheel picker work for everyone is totally achievable with a few key considerations.
- Stick to Semantic HTML: Don't just use a
<div>and style it to look like a button. Use an actual<button>element. It comes with all the necessary keyboard and screen reader functionality built right in. - Announce the Winner: A sighted user sees the wheel stop, but a screen reader user needs to be told what happened. The best way to handle this is with an ARIA live region (
aria-live="polite") that audibly announces the selected name after the spin completes. - Don't Forget Focus States: Make sure keyboard navigation is clear. Anyone tabbing through the page should see a visible outline on the buttons and interactive elements.
These simple adjustments can make a massive difference in usability for people who rely on assistive technologies.
Can I Give Some Names a Better Chance of Winning?
Absolutely, and this is a fantastic way to add a more advanced feature. Implementing weighted randomness is a common request for prize draws or raffles. Instead of dividing the 360-degree circle into equal slices, you'd carve it up proportionally.
Think of it this way: if one name has a weight of 2 and another has a weight of 1, the first name gets a slice of the pie that's twice as big. The tricky part is updating your JavaScript logic to map the final rotation angle to these uneven segments, but it's a really satisfying feature to implement.
Ready to build your own suite of powerful, private, and offline-first developer tools? Explore the complete collection at Digital ToolPad and see what you can create without ever sending data to a server. Visit us at https://www.digitaltoolpad.com.