
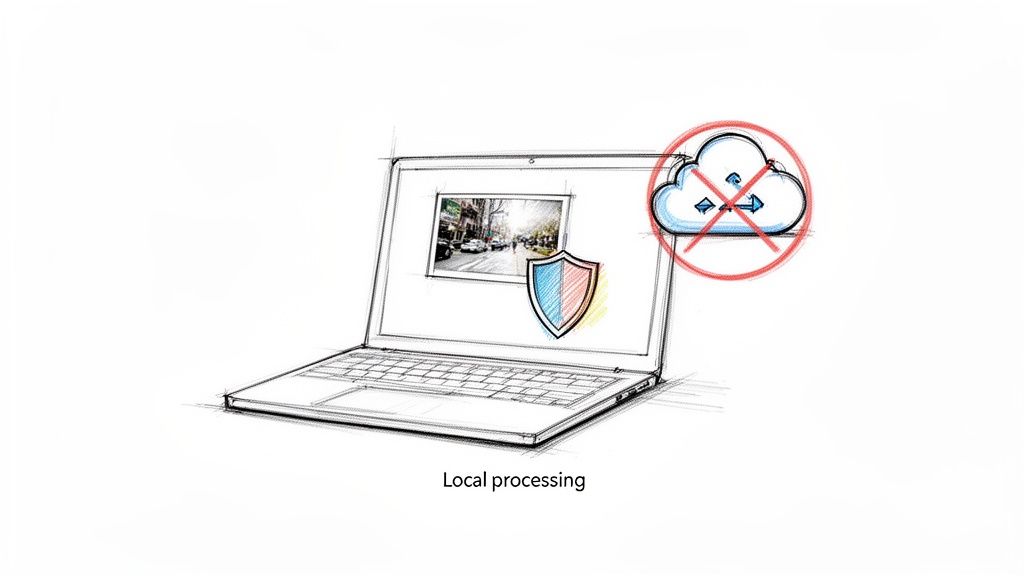
Uploading a sensitive document or a personal photo to some random website just feels risky, doesn't it? There's a good reason for that gut feeling. A privacy-first image resizer works in a fundamentally different way by doing all the heavy lifting right inside your browser.
What that means is your files never leave your computer. It’s a simple concept, but it offers complete security and some much-needed peace of mind.
Why a Privacy-First Approach Is a Game-Changer
When you use a typical online tool, the first thing you do is upload your image to their server. The moment you hit that "upload" button, you’ve lost control. Your file travels across the web, gets processed on a computer you know nothing about, and is then sent back to you. This whole server-side process opens the door to a bunch of risks.
Think about it: that company could be storing your images, either temporarily or permanently, with or without you even knowing. Those stored files could then be exposed in a data breach, accessed by employees, or even used to train AI models. If you're working with client materials or unreleased product photos, uploading them to an unknown server could easily put you in breach of an NDA and create some serious compliance headaches.
The Power of Keeping It Local
A client-side, or "offline," image resizer sidesteps all these problems. It uses the processing power of your own device, so your data stays right where it belongs—with you. Nothing gets uploaded, transmitted, or saved on some third-party server.
This local approach has some clear advantages:
- Total Control: Your files stay on your machine. Period. You have complete sovereignty over your sensitive information.
- Rock-Solid Security: By never uploading anything, you eliminate the risk of your images being intercepted or caught up in a data breach.
- Blazing-Fast Speed: Processing happens instantly in your browser. There’s no waiting for slow uploads or downloads, which is a huge time-saver with large files.
Server Upload vs. Local Processing: A Quick Comparison
To really see the difference, let's break down how these two approaches stack up against each other. It becomes pretty clear why local processing is the way to go for anything you wouldn't want to become public.
| Feature | Traditional Server-Side Resizer | Client-Side Offline Resizer |
|---|---|---|
| File Location | Uploaded to a remote server | Stays on your computer |
| Privacy Risk | High (breaches, misuse) | Extremely Low (nothing is transmitted) |
| Speed | Slow (depends on upload/download) | Instant (uses your device's power) |
| Internet Required | Yes, for uploads & processing | No, once the tool is loaded |
| Security Control | You trust the service provider | You have 100% control |
The bottom line is that client-side tools give you the functionality you need without forcing you to hand over your data.
Choosing a tool that processes images locally isn't just a minor technical detail—it's a fundamental decision about data security. It ensures you never have to trade privacy for convenience.
This isn’t just a niche concern, either. The digital image processing market was valued at $93.27 billion recently and is projected to skyrocket to $435.68 billion by 2035. This kind of explosive growth shows just how critical it is to have tools that are not only powerful but also trustworthy.
Ultimately, using a privacy-first resizer gives you the confidence to work with any file, no matter how sensitive. You can see how we've built this principle into our own tools in our guide to the Digital ToolPad image resizer.
Resizing a Single Image Without Losing Quality
You’ve got the perfect photo, but it’s a monster. The file size is huge, making it a poor fit for your website or that next social media post. The real challenge is shrinking it down without turning that crisp, beautiful shot into a blurry, pixelated mess. It’s a common problem, but one you can easily solve.
Let’s say you’re prepping a product photo for your online store. The original from your camera is a massive 6000x4000 pixels, but your site’s gallery needs images to be no wider than 1080 pixels. If you just cram it into that smaller space without thinking, you’ll lose all the fine details that make your product look good.
Pixels Versus Percentage
Most image resizing tools give you two main options for setting the new size: you can either punch in the exact pixel dimensions or scale it down by a percentage. Knowing which to choose makes all the difference.
Resizing by Pixels: This is your go-to when you have a specific size you need to hit. For that e-commerce example, setting the width to 1080 pixels is the most direct way to meet the website’s rules. This is perfect for web design, profile banners, or blog post images where precision is key.
Resizing by Percentage: This works great for general size reduction. If you just need a smaller version to attach to an email or drop into a draft document, you don’t need to be exact. Knocking it down by 25% or 50% is a quick and simple fix.
The Golden Rule of Aspect Ratio
No matter which method you pick, there’s one rule you can’t ignore: always maintain the aspect ratio.
The aspect ratio is just the relationship between the image's width and its height. If your original 6000x4000 photo has a 3:2 ratio, your resized version has to keep that same proportion.
Break this rule, and you’ll get a stretched or squashed image that looks distorted and completely unprofessional. Any decent resizing tool will have a checkbox labeled "lock aspect ratio" or "maintain proportions." Keep it checked. Always. When you type in your new width of 1080 pixels, the tool should automatically figure out the correct height (720 pixels) to keep everything looking right.
Resizing isn’t just about making a file smaller. It’s about making it fit a new purpose without destroying its quality. Locking the aspect ratio is the most important step in that process.
While shrinking images is the usual task, sometimes you need to go the other way and make a small image larger. This is called upscaling, and it can quickly lead to a blurry disaster. If you ever need to enlarge a photo without losing detail, it's worth checking out the best free AI image upscaler tools. They use some impressive tech to add pixels intelligently and keep things sharp.
Mastering Batch Resizing to Boost Your Productivity
Resizing a single image is easy enough, but what happens when you have dozens—or even hundreds—of them? Anyone who's managed a photoshoot or prepared a full set of marketing assets knows the pain of resizing images one by one. It’s a tedious, soul-crushing time sink.
This is exactly where batch resizing comes in and changes everything. Instead of slogging through the same steps over and over, you apply them to a whole folder of images at once. It’s a simple concept that completely transforms your workflow, saving you a massive amount of time and keeping your assets consistent. Using an offline tool is a game-changer here, since you skip the slow upload-and-download cycle for every single file.
A Practical Workflow for Bulk Resizing
Let's walk through a real-world example. You just wrapped a product shoot and have 150 photos ready to go. Some are landscape, others are portrait. Your e-commerce site requires them all to fit neatly within a 1200x1200 pixel container.
Here's how I'd tackle this:
- Use a "Fit Within" Constraint: Don't just set a fixed 1200x1200 dimension; that will stretch and distort your images. The smarter move is to use a "fit within" or "max dimension" setting. This tells the tool to shrink each photo proportionally until its longest side hits 1200 pixels, which perfectly preserves the original aspect ratio.
- Create a Naming Convention: A good batch resizer will let you set up a naming template. You can automatically add a suffix like "-web" or "-1200px" to each filename (e.g.,
product-shot-001-web.jpg). This simple step keeps your original high-res files untouched and makes your new web-ready versions easy to find.
The idea is to shrink the file without sacrificing its quality or integrity, as this diagram shows.
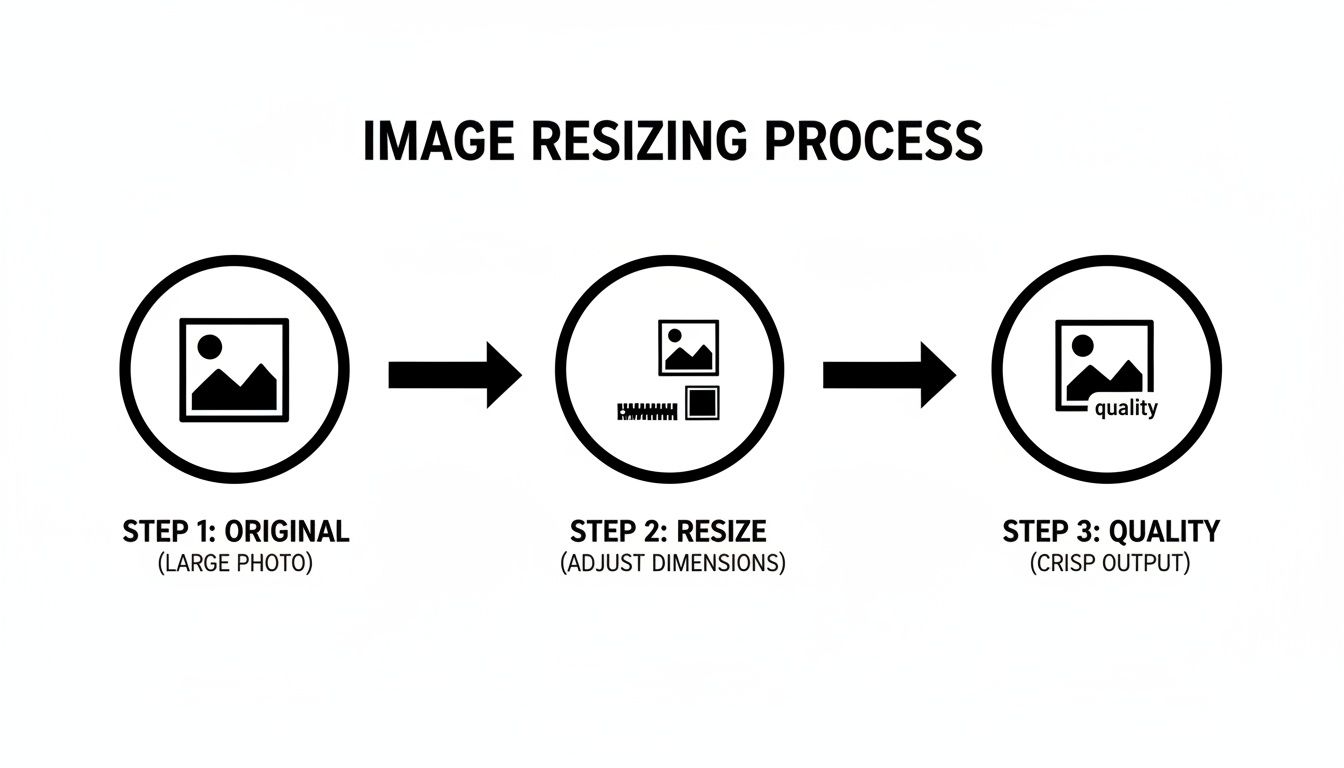
It’s about more than just making a picture smaller; it's about maintaining its professional quality throughout the process.
Beyond the Basics: Insider Tips
Once you have the fundamentals down, a few pro tips can make your workflow even smoother. This kind of efficiency is why the market for photo resizer apps is booming—it was valued at around $250 million recently and is expected to grow by 15% annually through 2033. People need powerful, fast tools.
Pro Tip: When your batch includes a mix of portrait and landscape photos, always use a 'longest side' or 'fit within' constraint instead of setting a fixed width and height. This one setting is smart enough to handle both orientations correctly without you having to sort them first.
This little trick saves you from that frustrating moment when your vertical images get squished too narrow or your horizontal ones end up too short. It’s a simple, set-it-and-forget-it approach that guarantees every image comes out looking right.
If you're looking for a tool that handles these scenarios without any fuss, take a look at our post on the Digital ToolPad free image resizer. It's built for exactly this kind of real-world, productivity-focused work.
Choosing the Right Format and Compression Settings
Getting your image dimensions right is half the battle, but the real art of optimization comes down to picking the right file format and compression level. This is where you can make a huge impact on your site's speed and visual polish. A good resizer image tool will give you hands-on control over these critical settings.
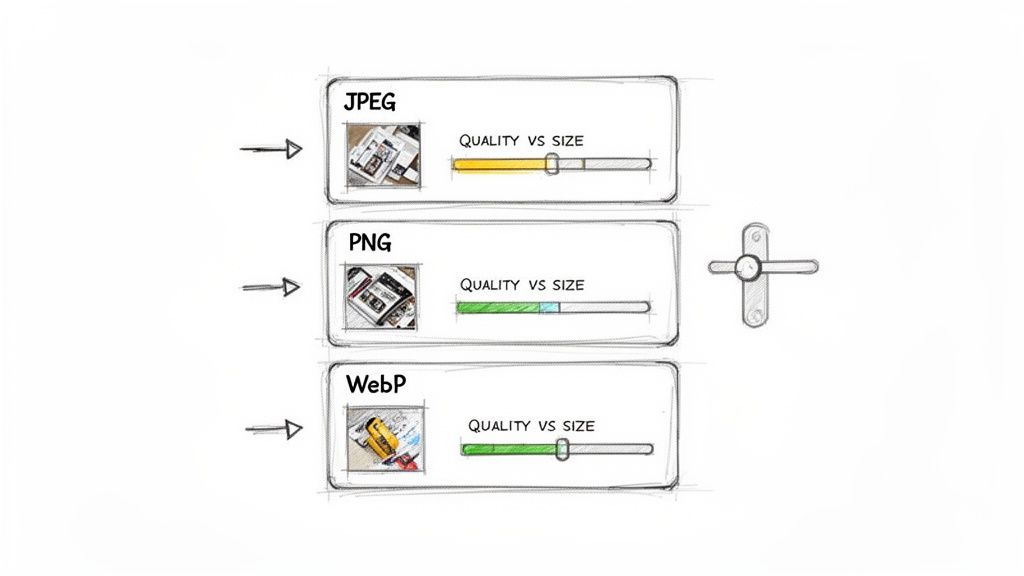
Think of image formats like different containers, each designed for a specific job. For pretty much anything you do on the web, you'll be choosing between three main contenders: JPEG, PNG, and WebP. Your decision here affects everything from file size and clarity to whether you can have a transparent background.
Picking the Best Format for the Job
Each format has its own superpower. Once you learn what they are, you’ll instinctively know which one to grab for any situation.
JPEG (or JPG): This is your go-to format for photographs and any image with complex colors or gradients. JPEGs use "lossy" compression, which is a clever way of saying it discards a tiny bit of image data to shrink the file size dramatically. The quality trade-off is often invisible, but the speed benefits are massive.
PNG: Reach for PNG when you're working with graphics that have sharp lines, like logos, icons, or text overlays. Its biggest selling point is support for transparent backgrounds. PNGs use "lossless" compression, keeping every single pixel intact, but that perfection comes with a much heavier file size.
WebP: This is the modern, do-it-all format created by Google. It's incredibly efficient, offering both lossy and lossless compression that consistently beats JPEG and PNG in creating smaller files for the same level of quality. It handles transparency, too, making it a fantastic all-rounder.
The core decision is simple: for photos, start with JPEG. For logos or graphics needing transparency, choose PNG. For everything else, WebP is an excellent, modern choice that balances quality and performance.
To make things even clearer, here’s a quick-reference table to help you decide on the fly.
Quick Guide to Common Image Formats
| Format | Best For | Key Characteristics |
|---|---|---|
| JPEG | Photographs, complex images, and gradients. | Uses lossy compression for small file sizes. No transparency. |
| PNG | Logos, icons, and graphics with sharp lines. | Uses lossless compression for perfect quality. Supports transparency. |
| WebP | A versatile replacement for both JPEG and PNG. | Excellent compression (both lossy and lossless). Supports transparency. |
Knowing these basics will save you a ton of headaches and help you build faster, better-looking websites.
Understanding the Compression Balancing Act
Once you’ve settled on a format, it’s time to fine-tune the compression. This is a classic balancing act: file size versus visual quality. For JPEGs and lossy WebPs, this is usually controlled by a quality slider, often from 0 to 100.
Cranking the quality to 100 gets you a beautiful image, but the file size will be huge. In my experience, dropping that setting to somewhere between 75-85 can shrink the file by 30-50%, and you’d be hard-pressed to spot the difference.
If you push the quality below 60, you’ll likely start seeing ugly compression artifacts or pixelation, especially on larger images. The sweet spot really depends on the image itself and where it’s going to live. Always preview the result before you commit—it’s the only way to be sure you've found that perfect balance.
Integrating Offline Resizing into Developer Workflows
For those of us building web applications, the tech behind a secure, client-side resizer image tool is more than just a neat trick—it’s a blueprint for building faster, more secure apps. The very same JavaScript that powers these in-browser tools can be baked directly into your own projects, giving you total control over image manipulation without a single byte hitting your server prematurely.
Think about it. A user tries to upload a massive 10 MB photo for their profile picture. The old way meant a long wait, a bloated server request, and a backend job to crunch it down. The new way? You can resize that image right in their browser before it even begins uploading. This is a game-changer for user experience, slashes your bandwidth costs, and takes a huge load off your servers.
Leveraging Client-Side Power
So, how does this magic work? It all comes down to a couple of browser-native technologies: the HTML5 Canvas API and the File API. Together, they let you read a local image file, draw it onto a hidden canvas at whatever new dimensions you want, and then export it as a freshly optimized image.
This isn’t just for user-facing features, either. You can easily automate this stuff in your own development workflow. For example, you could whip up a Node.js script that chews through an entire directory of images for a static site, making sure every single asset is perfectly sized during the build process. No external services needed.
By handling image resizing on the client-side, you're not just offloading processing; you're fundamentally shifting your application's architecture to be more private and efficient. It's a win for the user and a win for your infrastructure.
This move toward local processing is also making waves in the professional world. The AI Image Editor market, which covers advanced resizing, was recently valued at a staggering $88.7 billion. A huge chunk of that—42%, to be precise—comes from enterprise users who are all about efficiency and quality. If you want to dive deeper into the numbers, you can explore these AI image statistics.
Putting these techniques to work means you can build features that are secure by design. A great example is a tool that generates a perfectly sized favicon from a much larger logo image—a task that needs zero server-side logic. You can see how that works in our guide on creating favicons. By keeping everything on the user's machine, you’re delivering a faster, safer experience all at once.
Common Questions About Image Resizing Tools
Even with a solid workflow, you're bound to run into a few questions when resizing images. Getting a quick, clear answer can be the difference between a polished final product and a frustrating do-over. This section is all about tackling those common hurdles head-on.
Think of this as your quick reference guide. We'll cut through the noise and give you straightforward solutions to the most frequent issues, from fuzzy images to the magic behind offline tools.
Why Is My Image Blurry After Resizing?
This is, without a doubt, the most common frustration. The problem almost always boils down to one of two things. First, you're likely trying to enlarge a small image. When you stretch a low-resolution photo, the software has to invent new pixels to fill the gaps, and that guesswork leads to blurriness.
The other culprit is often over-compression. Pushing a JPEG's quality setting below 60 will almost always create noticeable artifacts and a soft, fuzzy appearance. For a good balance of size and clarity, aim for a quality level between 75-85 and always, always start with the largest, highest-resolution source image you have.
The golden rule of resizing is simple: it's always better to shrink a large, high-quality image than it is to enlarge a small one. Garbage in, garbage out.
How Can an Image Resizer Work Offline?
It might feel a bit like magic, but it's really just clever, privacy-focused engineering. An offline resizer leverages the processing power already built into your web browser. When you visit the tool's page, all the necessary code (usually JavaScript) downloads to your computer just once.
From that moment on, the entire process happens right on your machine. Your browser uses its own internal tools—like the File API to read your image and the Canvas API to redraw it to the new size—without ever sending your data to a server. This makes the process incredibly fast, totally secure, and independent of your internet connection.
What Is Interpolation and Do I Need to Worry About It?
In simple terms, interpolation is the method a tool uses to decide the color of the new pixels when an image is resized. You might see different algorithms mentioned, like Bilinear, Bicubic, or Nearest Neighbor, and each one creates slightly different results in sharpness and smoothness.
But for most day-to-day use? You really don't need to get bogged down in the details. Modern tools typically default to a method like Bicubic, which provides an excellent balance of quality and speed for nearly all situations. Unless you're a professional photographer or graphic designer doing highly detailed work, the default setting is almost always your best bet. If you're looking for an easy way to manage these adjustments, a dedicated image resizer can handle the technical details for you.
Ready to resize your images with a tool that puts your privacy first and delivers instant results? The Digital ToolPad suite of utilities runs 100% in your browser, ensuring your data never leaves your computer. Try our fast, secure, and completely free tools today at https://www.digitaltoolpad.com.