An image resizer seems simple enough—it just changes a picture's dimensions. But the real decision isn't about pixels; it's about where that resizing happens. The distinction between an online tool that uploads your files and an offline one that keeps them secure is massive.
Why a Privacy-First Image Resizer Is a Game Changer
Resizing an image feels like a quick, harmless task, but it often hides a major security blind spot. When you use a typical online resizer, you're uploading your file to a server you know nothing about. That file—whether it’s a confidential client mockup, a new product photo, or an internal document—is no longer under your control.
This standard upload-process-download cycle is riddled with problems:
- Data Exposure: Your files could be stored indefinitely, scanned for data, or even compromised in a breach, all without your knowledge.
- Compliance Risks: If your business is governed by regulations like GDPR or HIPAA, uploading client or patient data to an unvetted third-party server can have serious legal and financial consequences.
- Workflow Bottlenecks: Your productivity is tethered to your internet speed and the server's traffic, creating frustrating delays right when you're on a deadline.
A privacy-first approach completely flips this risky model on its head.
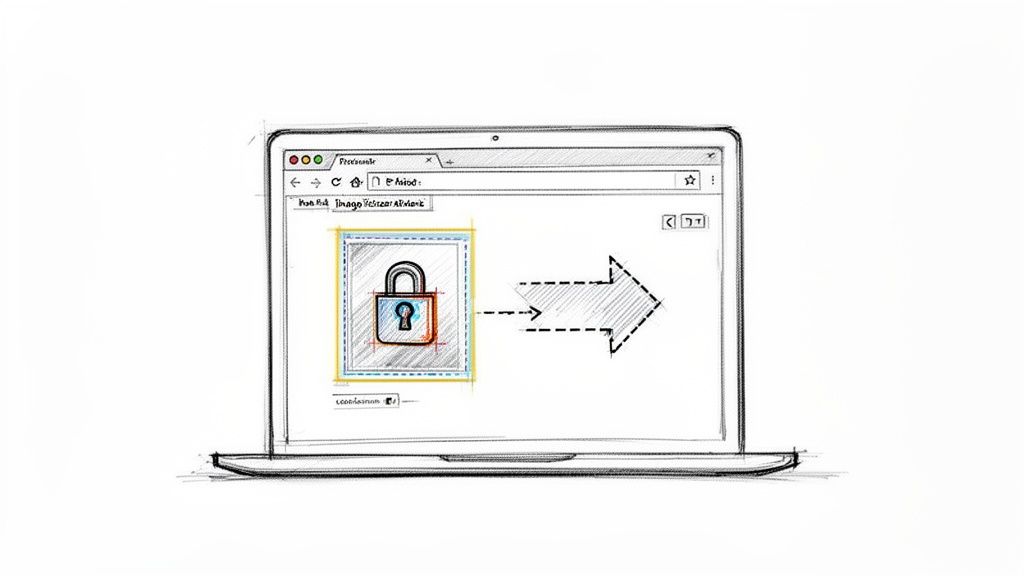
This is the core idea behind a tool like Digital ToolPad: all the work happens right inside your browser. Nothing ever gets uploaded, so your data never leaves your machine.
The Power of Local Processing
A browser-based, offline image resizer like ours runs everything directly on your computer. It’s a fundamental shift that brings real, tangible benefits. This local-first architecture isn’t just a nice-to-have feature; it’s a necessity for anyone handling sensitive visuals.
Imagine a freelance designer working on a top-secret brand refresh for a major corporation. Uploading those early mockups to a random website is simply not an option. With a local tool, they can resize images for web, social, and print previews without ever sending that valuable intellectual property across the internet.
The single biggest advantage of an offline image resizer is data sovereignty. You maintain 100% control over your assets from start to finish, eliminating the risk of data leaks, unauthorized access, or compliance violations.
Real-World Scenarios Where Privacy Matters
This isn't just a theoretical problem. For countless professionals, data privacy is a daily, non-negotiable part of the job.
- Developers and DevOps: A team might need to resize screenshots containing sensitive user information for a bug report. Uploading those images is completely out of the question.
- Legal and Finance: A paralegal resizing scanned contracts or a financial analyst adjusting receipt photos for an expense report can't afford to have that data sitting on a third-party server.
- Healthcare Professionals: Adjusting patient-related images for presentations or internal records demands strict adherence to privacy laws. An offline tool is the only way to stay compliant.
The demand for secure, efficient tools is growing fast. The image editing software market, which includes resizers, was valued at $1,149.06 million and is on track to hit $1,818.9 million by 2034. This growth underscores the frustration with cloud-based editors, where data leaks and lag are constant worries. Privacy-first tools like Digital ToolPad offer a better way, letting teams manage sensitive files with zero compliance headaches.
When you're evaluating tools, it's always a good idea to check their policies. A transparent document like PixelPanda's privacy policy shows how a company committed to privacy operates.
This local-first approach is about more than just security. It’s like having a powerful desktop app you can access with a simple link. There’s nothing to install, no updates to manage, and zero lag because everything happens instantly. This secure, browser-based model is becoming crucial for more than just images. For instance, teams can get the same benefits from our other offline tools, like our secure, offline QR code generator, which is perfect for internal use. For any modern professional, choosing the right tool is the first step toward building a secure and efficient workflow.
Resizing a Single Image Without Losing Quality
Resizing a single image seems simple, but there's a real art to getting it right. It’s not just about shrinking the dimensions; it's a balancing act between keeping the file size small for fast loading and making sure the image stays sharp and clear. Whether you're prepping a big hero image for a homepage or a simple graphic for a blog post, your choices here make a huge difference in how your site performs.
First things first, take a look at your source image. Is it a photograph packed with rich colors and subtle textures? Or is it something simpler, like a logo with clean lines and flat colors? Knowing what you're working with is the key to picking the right format for the job.
Choosing the Right File Format
The file format is your starting point, and it’s the foundation for a high-quality resize. Each one has its own strengths, and using the wrong one can lead to ugly artifacts or a bloated file size. It's like trying to use a hammer to turn a screw—you need the right tool.
Here’s a quick rundown of the big three for the web:
- JPEG (or JPG): This is your workhorse for photographs. Its compression is brilliant at handling the complex color gradients in photos, making it the industry standard. The catch? It doesn't do transparency and can get blocky around sharp edges if you push the compression too far.
- PNG: The perfect choice for anything with sharp lines, text, or solid colors, like logos and icons. PNG uses lossless compression, so you don't lose any quality, and it supports transparency flawlessly. The trade-off is that it creates much larger files for photographic images.
- WebP: This is the modern format from Google that gives you the best of both worlds. It delivers fantastic compression for both photos and graphics—often smaller than both JPEG and PNG—and it supports transparency. Browser support is nearly universal now, making it an excellent default choice.
For example, I'd almost always use WebP or JPEG for a product photo on an e-commerce site. But for the company logo in the header? PNG is the clear winner to keep those edges looking crisp.
The Art of the Quality Slider
Once you've picked a format, it’s time to play with the quality. This is where you find that perfect sweet spot between a tiny file and a beautiful image. Most tools, including our own browser-based image resizer, have a quality slider that usually goes from 1 to 100.
It’s tempting to just leave it at 100, but you almost never need to. For JPEGs and WebPs, I've found a quality setting between 75 and 85 usually slashes the file size with virtually no visible drop in quality. Go much below 70, and you’ll likely start seeing some nasty blockiness or color banding. It's a careful dance.
My personal rule of thumb is to start at 85 and check the preview. If the file is still too big, I’ll nudge it down by five, check again, and repeat. As soon as I spot an artifact, I dial it back up a notch. This little process guarantees the best compression without making the image look unprofessional.
Why Metadata Matters
Hidden inside most image files is something called metadata, or EXIF data. This is just extra information like the camera model, the date the photo was taken, and sometimes even the GPS coordinates of where it was shot. While that can be useful, it also adds to the file size and can be a privacy concern.
Most resizing tools give you the option to keep or remove this data.
- Preserve Metadata: Essential if you're a photographer who needs to keep copyright info embedded or for archival purposes.
- Strip Metadata: This is the best choice for web performance and privacy. Getting rid of this extra data can shave off a few kilobytes and ensures you’re not accidentally sharing sensitive location info.
For a website's hero image, stripping the metadata is a no-brainer. Visitors don't need to know what camera you used. By using a secure, offline tool like the one on DigitalToolpad.com, you can handle all of this without your files ever leaving your computer. It keeps your workflow private, fast, and secure.
Taming the Beast: Batch Resizing for Large Workflows
Resizing one or two images is simple enough. But what about when you’re staring down a folder with hundreds of product shots for a big e-commerce launch? That's a different story entirely. Tackling them one by one is a recipe for a long, tedious day and a high chance of mistakes. This is precisely where batch processing with a good image resizer becomes your best friend.
Batch resizing is all about applying the same set of rules to a whole bunch of images at once. Let's say you have 500 new product photos. Every single one needs to be a perfect 1080x1080 pixels, compressed to an 80 quality setting, and stripped of metadata to keep page load times snappy. A solid batch workflow turns what could be a multi-day slog into a job you can knock out in minutes.
Setting Up a Consistent Batch Process
The secret to a great batch resize is consistency. Every image needs to come out looking uniform and professional. A reliable browser-based tool is perfect for this job because it saves you from installing clunky software and keeps everything in one place.
Here are the core settings you'll want to lock in for your batch:
- Uniform Dimensions: Settle on a standard width and height. For product grids, a square aspect ratio like 1080x1080 is a popular choice.
- Quality Level: Pick a single quality setting and stick with it. For WebP or JPEG, a value between 75-85 usually hits the sweet spot between file size and visual clarity.
- File Naming Convention: A smart naming system is a lifesaver. Appending a suffix like
_thumbor_1080pto each filename makes it incredibly easy to tell the resized versions apart.
Getting the resize right isn't just about changing the dimensions. It's a three-step dance of choosing the right format, tweaking the quality, and deciding what to do with the metadata.
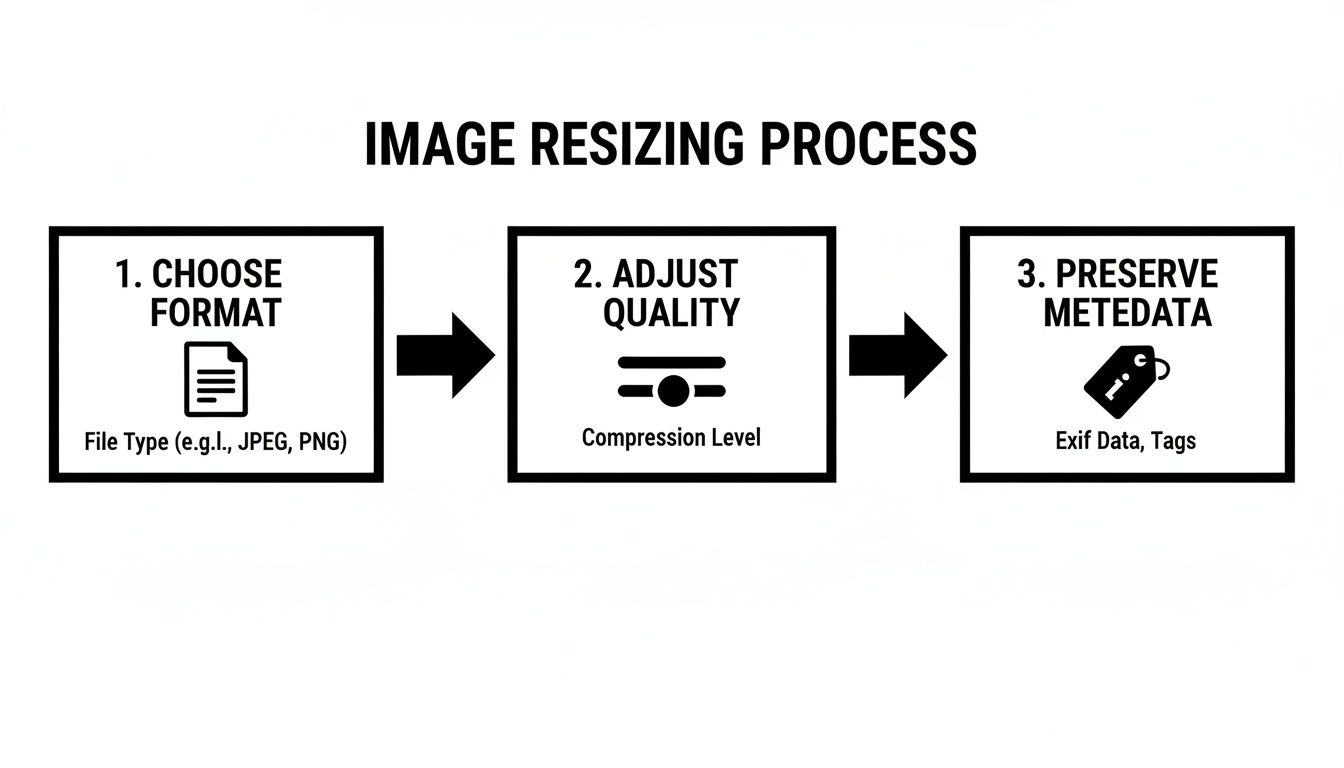
This little flowchart nails it. A great resize is a thoughtful process, whether you're working on one image or one thousand.
What About Mixed Aspect Ratios?
One of the biggest headaches you'll run into with batch resizing is handling a mix of portrait and landscape photos. If you just force a tall, skinny photo into a square, it’s going to get stretched and distorted—a dead giveaway of an amateur job.
A smarter image resizer will give you options to handle this gracefully. Instead of stretching, you can use a "fit" or "fill" method. This technique resizes the image to fit within your target dimensions while keeping its original aspect ratio. It often adds a subtle background color to fill any empty space, ensuring every image looks crisp and professional without any weird distortion.
The point of a batch workflow isn't just speed; it's precision. A well-oiled process makes sure every single image meets your site's technical and aesthetic standards, which is key to a great user experience.
The demand for these kinds of efficient tools is exploding. The photo resizer app market has already hit a $250 million valuation and is projected to grow at a 15% compound annual rate through 2033. This growth is fueled by the sheer volume of images we all have to manage. While cloud-based tools are everywhere, teams concerned with privacy are turning to offline alternatives like Digital ToolPad. Its browser-based image resizer does all the work locally on your machine, so your sensitive assets are never uploaded to a server. For anyone serious about data security, that’s a huge win. You can read more about these market trends and what they mean for developers.
A Real-World E-Commerce Example
Let's walk through a common scenario. You're getting 300 high-resolution photos ready for a new clothing line.
- Select Your Images: Just drag the entire folder and drop it into your browser-based batch resizer.
- Set Output Dimensions: You need a uniform size, so you set the tool to resize to 1200px on the longest side. This handles both landscape and portrait shots perfectly, keeping their original proportions.
- Apply Quality and Format: You choose the modern WebP format and set the quality to 80% for that ideal balance of size and clarity.
- Manage Metadata: To trim every last kilobyte, you select the option to strip all EXIF data.
- Define Naming: Finally, you add the suffix
_webto each new file for easy organization.
With just a few clicks, you’ve turned a massive, jumbled collection of photos into a perfectly optimized, web-ready catalog. This is the kind of efficiency that lets modern e-commerce sites and digital galleries manage enormous visual libraries without bogging down their performance.
How Resizing Boosts Web Performance and SEO
Resizing your images isn't just about making them fit on a page; it's one of the most effective things you can do to boost your website's speed and, by extension, its search engine ranking. An oversized image is like an anchor dragging your site down. It hogs bandwidth, makes your pages crawl, and ultimately creates a frustrating experience for anyone trying to visit.
Think about it: when a page takes forever to load, what do you do? You leave. Your visitors are no different. Google’s data shows that 53% of mobile users will bounce if a site takes more than three seconds to load. Since images are often the heaviest part of a webpage, they're usually the main culprit behind those slow load times.
Using a good image resizer to serve up properly sized visuals is the first and most important step to fixing this problem.
Modern Formats for a Faster Web
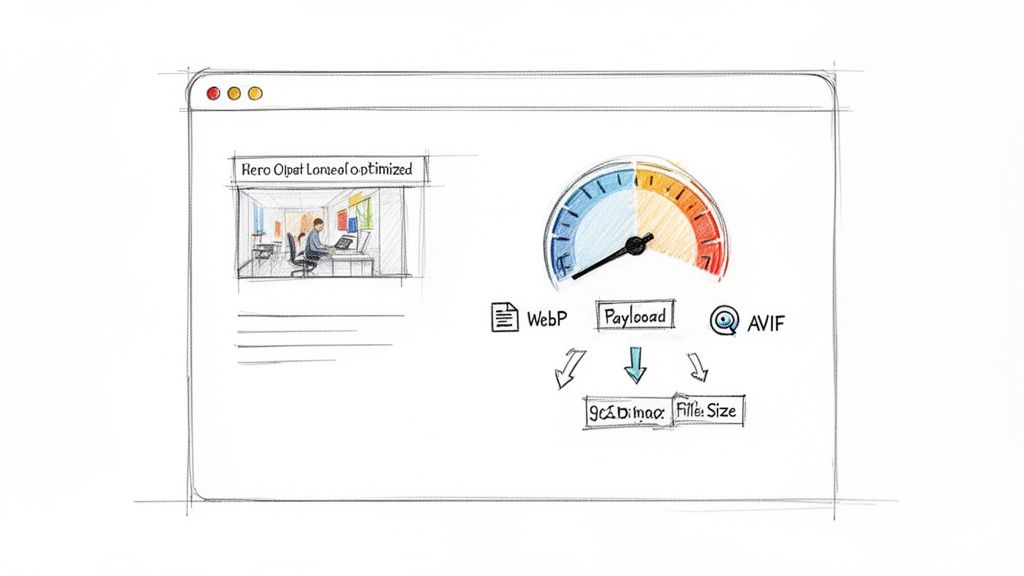
Beyond just changing the dimensions, the file format you choose has a massive impact on performance. We've relied on JPEG and PNG for years, but modern formats like WebP and AVIF blow them out of the water with far superior compression. That means you get the same quality in a much smaller file.
Here's a quick rundown:
- WebP: This format, developed by Google, can create files 25-34% smaller than a comparable JPEG. It's incredibly versatile, supporting both high-quality (lossy) and pixel-perfect (lossless) compression, plus transparency and animation.
- AVIF: As the new kid on the block, AVIF is even more impressive. It can shrink file sizes by 50% or more compared to JPEG without any noticeable drop in quality. Its adoption is growing fast, and it’s really the future of web images.
Making the switch can be a game-changer. Imagine a 1MB hero image saved as a JPEG. As an AVIF, that same image could be less than 500KB, instantly making your page load significantly faster.
To help you decide which format is right for your project, here’s a quick comparison of the most common options.
Image Format Comparison for Web Optimization
This table gives you a quick reference for the key characteristics of each format, helping you pick the best one for the job.
| Format | Best For | Transparency | Compression | Browser Support |
|---|---|---|---|---|
| JPEG | Photographs, complex images with gradients. | No | Lossy | Excellent |
| PNG | Logos, graphics with sharp lines, images needing transparency. | Yes | Lossless | Excellent |
| WebP | Versatile replacement for JPEG and PNG, animations. | Yes | Lossy & Lossless | Very Good |
| AVIF | Highest-quality images at the smallest file sizes. | Yes | Lossy & Lossless | Good & Growing |
Ultimately, the goal is to balance quality with file size. For most use cases today, WebP offers the best combination of support and performance, while AVIF is the top choice when you need maximum compression.
The Connection Between Page Speed and SEO
Search engines like Google are obsessed with user experience, and nothing kills UX faster than a slow website. That's why page speed is a confirmed ranking factor for both desktop and mobile searches. A faster site doesn't just keep users around; it sends a powerful positive signal to search algorithms.
When you resize and optimize your images, you're directly improving your Core Web Vitals—the specific metrics Google uses to measure a page's real-world usability. A better Largest Contentful Paint (LCP) score, which is heavily influenced by how fast your main image loads, can lead directly to better search visibility.
An optimized image is more than just a smaller file; it's a strategic asset. It improves user retention, lowers bounce rates, and directly contributes to a higher search engine ranking.
There’s a reason the market for image optimization tools is booming. Valued at $1.2 billion, it's projected to more than double to $2.8 billion by 2032. This growth is fueled by the simple fact that our image-heavy web needs to be fast. If you're interested in the market trends, you can explore detailed reports on image optimization trends.
Advanced Tactics for an Extra Edge
Once you have the basics of resizing and modern formats down, you can use a few more tricks to squeeze out every last bit of performance.
Strip Unnecessary Metadata Image files often contain hidden EXIF data from the camera, like the model, lens, and even GPS coordinates. This adds unnecessary weight and can be a privacy concern. Stripping this metadata is an easy win for both file size and security.
Implement Lazy Loading Lazy loading is a clever technique where images below the fold (outside the user's initial view) aren't loaded until the user scrolls down to them. This makes the initial page load much faster because the browser has less work to do upfront.
Use a Favicon Even the small details count. A sharp, optimized favicon not only reinforces your brand but also prevents those annoying 404 errors in browser tabs, contributing to a cleaner, more professional feel. You can create a great one with a tool like our privacy-first favicon generator.
For a real-world example of how critical image specs are, just look at Amazon's image listing requirements. They know that the right size and quality directly impact sales. By following these best practices, you can build a site that’s not just beautiful but also blazingly fast—giving you a serious edge.
Troubleshooting Common Resizing Problems
Even with a top-notch image resizer, things can sometimes go sideways. You might shrink a photo only to find it looks blurry, stretched, or that the file is still surprisingly large. Don’t worry—these are everyday issues, and thankfully, they usually have straightforward fixes.
Knowing how to diagnose and solve these problems is what separates a novice from a pro. Most headaches boil down to just a few culprits: mismatched aspect ratios, ugly compression artifacts, or simply using the wrong resizing algorithm for the job.
Let’s walk through the most common snags and how to get your images looking sharp again.
Fixing Stretched or Squashed Images
One of the most jarring resizing errors is seeing your image distorted into a funhouse-mirror version of itself. This happens when you force an image into new dimensions without respecting its original aspect ratio—the built-in relationship between its width and height.
What It Looks Like: A person might look unnaturally tall and skinny, or a car might appear short and wide. The image is clearly squashed or stretched out of shape, making it look amateurish and just plain wrong.
How to Fix It: The solution is simple: always lock the aspect ratio. When you type in a new width, a good tool will automatically calculate the correct height to keep everything in proportion.
If you absolutely must fit an image into a specific box (like a square container on a website), look for a "fit" or "fill" option instead of manually forcing the dimensions. This approach resizes the image to fit within the box and can add a background color to any empty space, which is a much cleaner way to avoid distortion.
Dealing with Blurriness and Pixelation
You’ve made your image smaller, but now it looks soft and blurry. Or worse, it’s a blocky mosaic of pixels. This loss of detail is a classic sign of either over-compressing the image or using the wrong resizing method.
What It Looks Like: Sharp edges in a photo become fuzzy, and fine textures lose their pop. For graphics or pixel art, you might see jagged edges and chunky, visible squares where you expect clean lines. This problem gets even worse when you try to make a small image larger.
How to Fix It: The key here is choosing the right resampling algorithm, which is just the fancy term for the method the software uses to calculate what the new pixels should look like.
- Bicubic: This should be your go-to for most photos. It analyzes a 4x4 grid of surrounding pixels to create a smooth, high-quality result when scaling down.
- Nearest Neighbor: Use this for pixel art, screenshots, or simple graphics with hard edges. It doesn’t try to blend pixels, so it keeps those sharp lines perfectly crisp without adding any blur.
- Bilinear: This is a faster but lower-quality option than bicubic. It’s a decent middle ground if speed is everything, but your results will likely be a bit softer.
When you shrink an image, the resizer has to intelligently discard pixel data. A superior algorithm like bicubic ensures this process is as clean as possible, preserving the visual integrity of your photograph.
Why Your Resized File Is Still Too Big
It’s a frustrating moment: you’ve reduced the dimensions, but the file size in kilobytes (or megabytes) is still much larger than you expected. This defeats one of the main goals of resizing—making your files lightweight and fast-loading for the web.
What It Looks Like: You've resized a 4000px image down to 800px, but the file size only dropped from 3MB to 1.5MB. For web performance, that’s still far too heavy for an image of that size.
How to Fix It: The problem usually isn't the dimensions but the compression level.
- Adjust the Quality Slider: For JPEGs and WebPs, the quality setting has a massive impact on file size. A setting somewhere between 75-85 often hits the sweet spot between a small file and great visual quality. Don't be afraid to experiment to see what works for your image.
- Strip Unnecessary Metadata: Image files often contain hidden EXIF data from the camera—things like camera settings, GPS location, and more. All of that adds weight. Use your image resizer to remove this data; it’s an easy way to shed extra kilobytes without touching the image itself.
- Choose a Modern Format: If you're saving a photo as a PNG, you're likely creating a needlessly large file. For photos, JPEG or WebP are almost always better choices. WebP, in particular, offers fantastic compression that can dramatically reduce file size without a noticeable drop in quality.
Got Questions About Resizing Images? We’ve Got Answers.
When it comes to resizing images, a few common questions pop up time and time again. Getting the right balance between quality, file size, and performance can feel like a dark art, but it doesn't have to be. Let's clear up some of the most frequent uncertainties.
What’s the Best Resolution for Web Images?
This is the big one, and the honest answer is: it depends. There’s no single "best" size. The ideal dimensions are all about context—specifically, where the image is going to live on your website.
Think of it this way: you want to resize your image to match the largest possible space it will fill. Any bigger is a waste of bandwidth.
- Full-Width Hero Images: For those big, impressive banners at the top of a page, you'll want something wide enough for large monitors. Aim for a width between 1920px and 2560px.
- Blog Post Images: When an image sits inside your content, you don't need it to be massive. A width of 800px to 1200px is usually the sweet spot.
- Product Thumbnails: These are much smaller, so think small. Something around 100px to 300px on the longest side is typically perfect for an e-commerce grid.
The whole point is to stop making your visitor's browser do the heavy lifting. When you serve an image that's already the right size, the page loads faster. It’s a simple, massive win for user experience.
Will Resizing an Image Wreck Its Quality?
The short answer is yes, technically. When you shrink an image (a process called downsampling), the software has to be smart about which pixels it throws away. Since data is being discarded, there’s always a tiny bit of quality loss.
But here’s the good news: when done right, you’ll never even notice it. A high-quality tool uses sophisticated algorithms, like bicubic interpolation, to blend the remaining pixels so smoothly that all the important details and sharpness are preserved.
The goal isn’t to avoid quality loss—that’s impossible. The goal is to manage it. You’re looking for that perfect sweet spot where the file size plummets without any visible drop in quality. And that's absolutely achievable.
Can I Make a Small Image Larger Without It Looking Blurry?
Ah, the "enhance!" request from every TV crime show. Unfortunately, upscaling (making a small image larger) is incredibly difficult and almost always ends in a blurry, pixelated mess. The software has to literally invent new pixels to fill the gaps, and it’s just guessing what should be there.
While some newer AI tools are getting surprisingly good at this, traditional resizing methods just can't pull it off without creating soft, unprofessional-looking results.
The best practice is non-negotiable: always start with the highest-resolution source image you can get your hands on. It’s infinitely better to scale a big, beautiful image down than to try and breathe life into a tiny, low-quality one.
Why Is an Offline Image Resizer Better for My Privacy?
The difference is simple but profound: it all comes down to where your files are processed. An offline, browser-based image resizer like ours does all the work right there on your own computer. Your files never get uploaded to some random server on the internet.
This is a huge deal for a few key reasons:
- Zero Data Exposure: Your images—whether they're confidential client mockups, new product designs, or personal photos—never leave your device. This completely eliminates the risk of them being intercepted, stored, or seen by anyone else.
- Built-in Compliance: If you work in an industry governed by data protection laws like GDPR or HIPAA, using an offline tool is the easiest way to stay compliant. You keep 100% control over sensitive data from start to finish.
- Total Secrecy: Since nothing is sent over the web, your activity is your business and your business alone. You can resize sensitive documents or images knowing with absolute certainty that no one is tracking you.
For anyone who cares about security and data ownership, a local-first tool isn't just a nice-to-have; it's a must.
Ready to resize your images with complete privacy and speed? Give the powerful, offline tools at Digital ToolPad a try and see how a secure, browser-based workflow can change the way you work. https://www.digitaltoolpad.com